Learn how to set up ™Cayia, connect your own AI API key, track money, run POS,
balance the cash drawer, manage inventory, create service tickets, sync devices, control rentals, use the tenant portal,
and generate reports from one organized guide.
™Cayia is a control center for modern multi-entrepreneurs. It brings financial tracking, POS, receipts, inventory, Cloud Sync, AI guidance, and project contracts into one organized workspace.
When to use it
Use this flow when creating a new ™Cayia account, choosing a plan, installing the desktop app, opening ™Cayia in the browser, or adding it to a phone as a PWA.
Steps
Go to cayia.app and choose the option to open the ™Cayia web app.
Create your account with your preferred email and password.
Choose the plan that matches your operation: Solo, Business, or Master Plan / Pro Business.
Open ™Cayia from the browser at https://cayia-sync-app.web.app/ or install the Windows version when available.
On mobile, open ™Cayia in the browser menu and choose the option to add it to the home screen as a PWA.
When the app updates, refresh the browser or reopen the desktop app to load the newest version.
Important tips
Use the same account across devices if you plan to use Cloud Sync.
Start with the dashboard first, then configure AI, POS, inventory, and projects as needed.
Project Contracts are part of the Master Plan / Pro Business plan.
Common problems
If you cannot sign in, confirm the email, password, and internet connection.
If the app looks outdated, refresh the page or clear the browser cache.
Video tutorial
Initial Setup
Configure your business
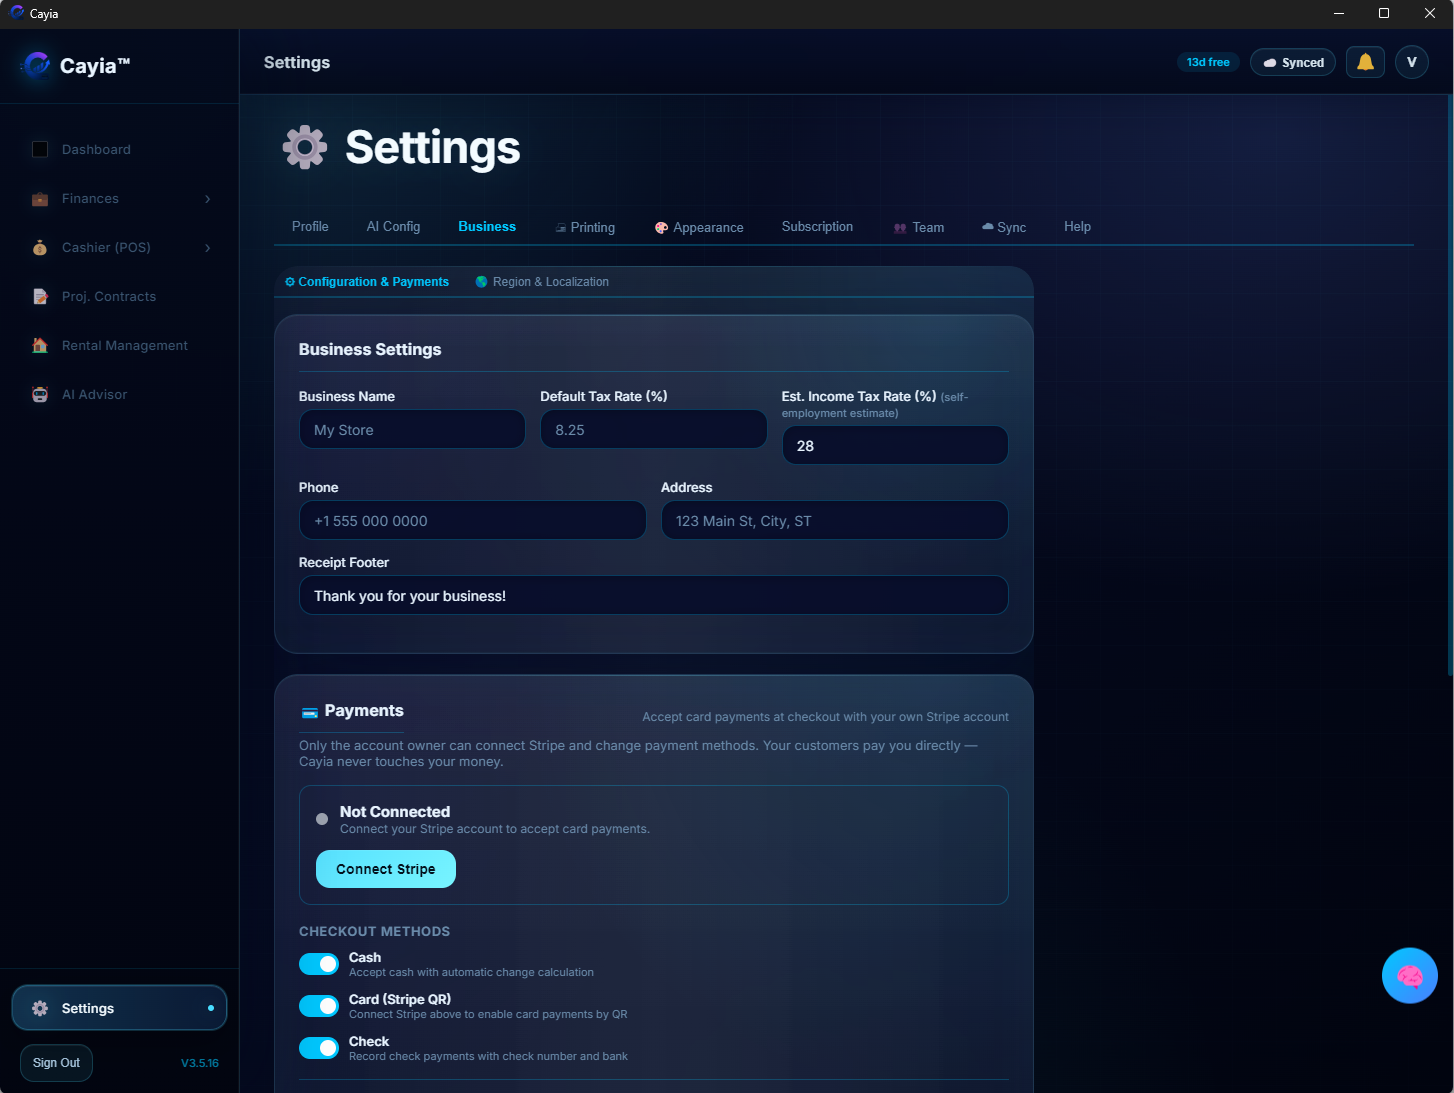
Set the basic information ™Cayia needs to organize your numbers, taxes, sync status, and device access.
What this helps you do
This setup keeps your dashboard, receipts, POS, reports, and sync behavior aligned with your real business.
When to use it
Use it after creating an account, changing business information, adding a new device, or turning on Cloud Sync.
Steps
Open Settings from the sidebar.
Add your business name and basic profile information.
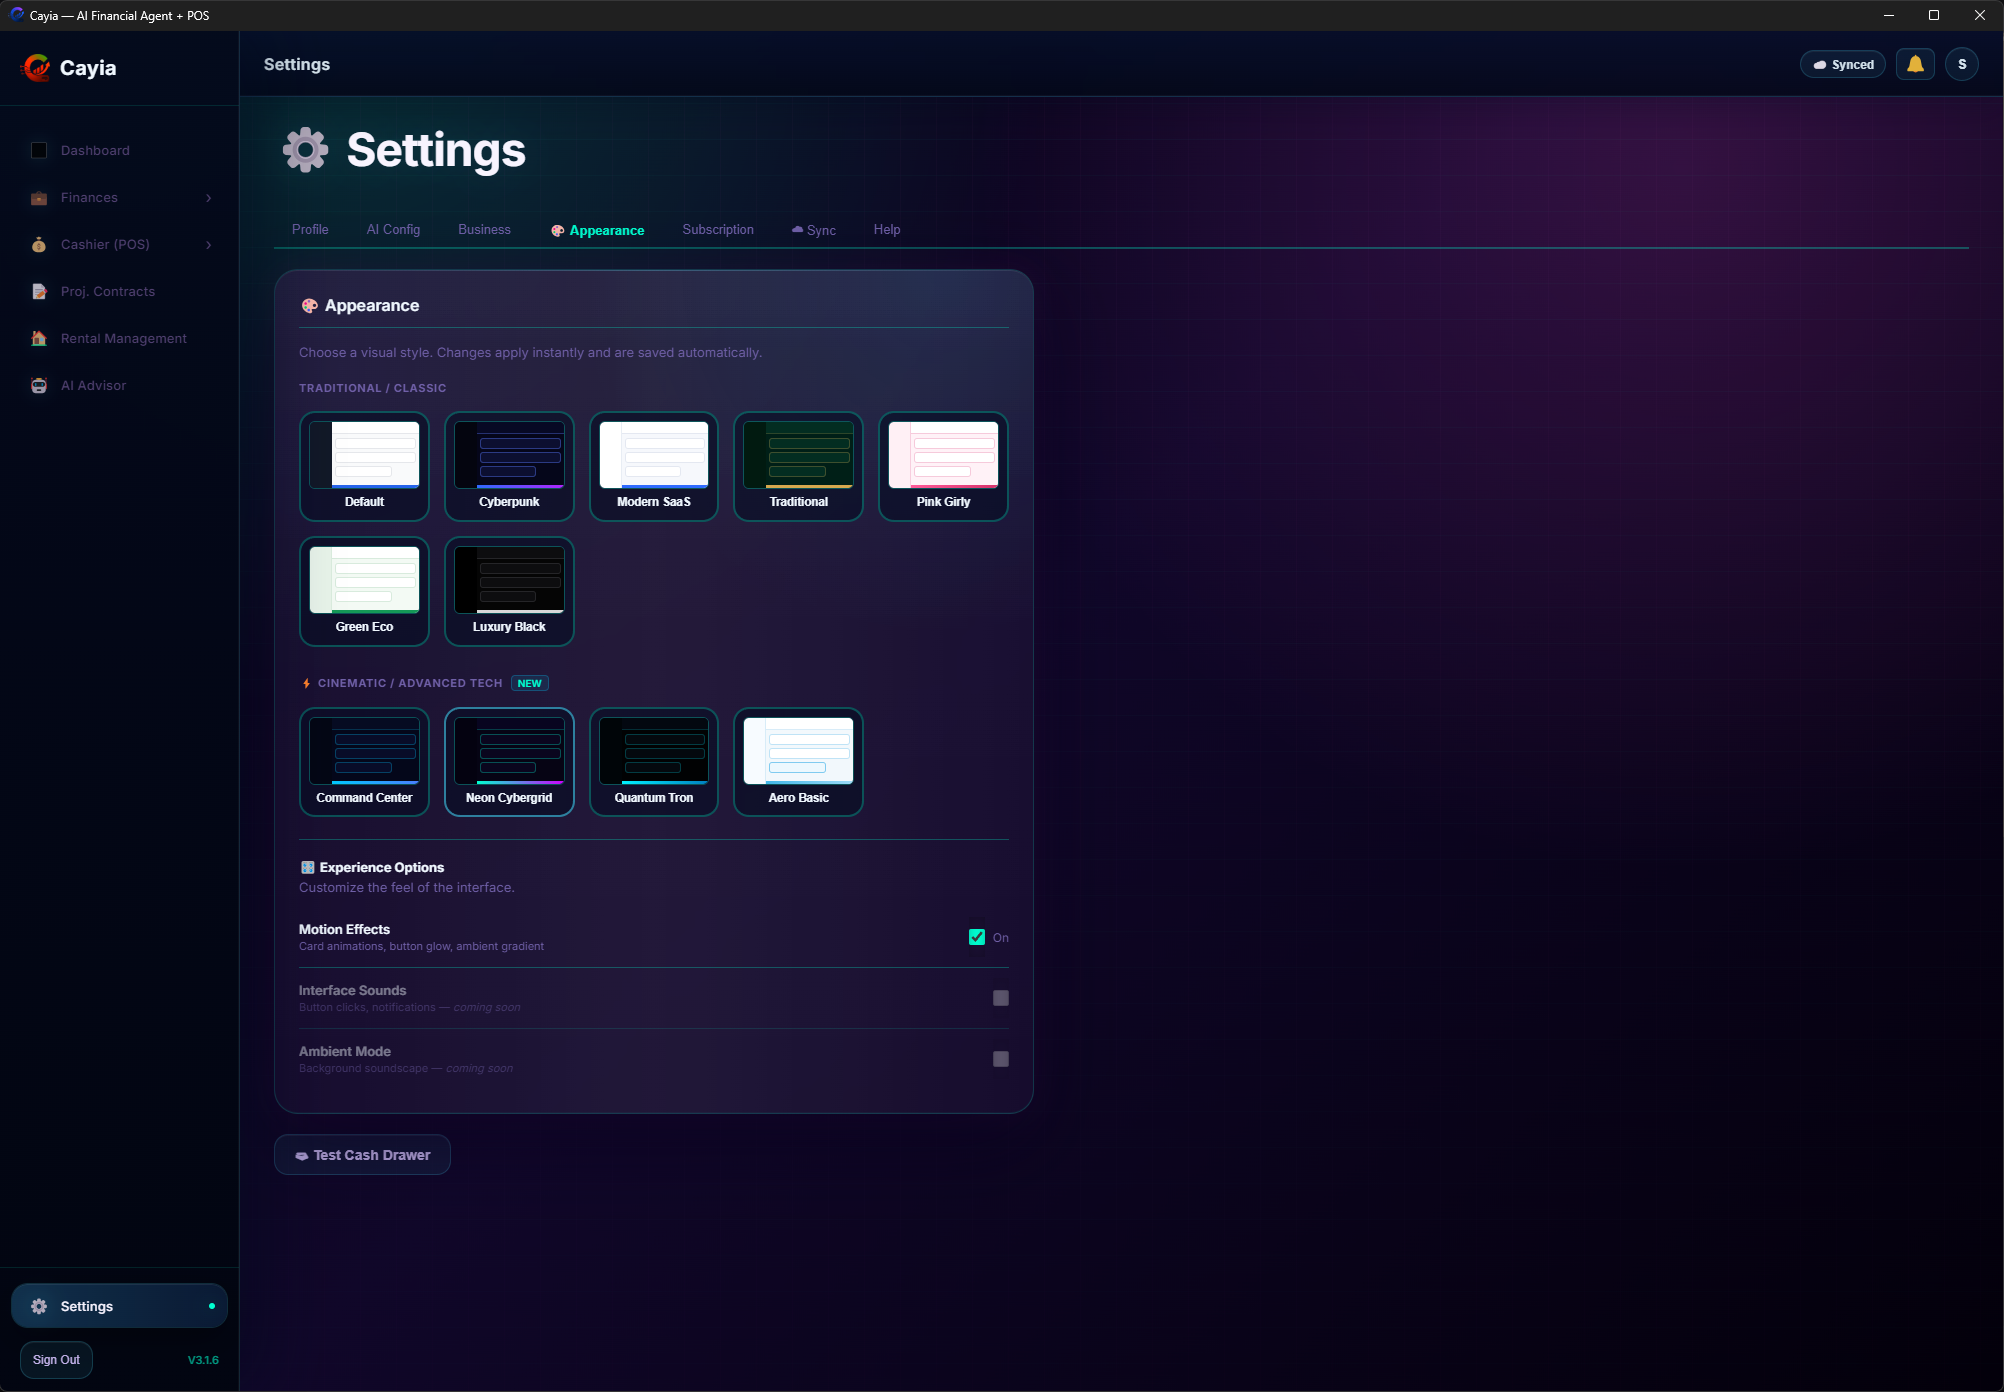
Review currency, tax preferences, receipt behavior, and appearance.
Open the sync area and connect Firebase Sync if your plan supports Cloud Sync.
Add approved devices and confirm each device shows as synced.
Save changes and return to the dashboard.
Important tips
Cloud Sync availability depends on your subscription plan.
Keep tax settings updated before exporting financial reports.
Common problems
If a device does not appear, sign out and sign in again on that device.
If sync does not activate, confirm the plan, connection, and account owner permissions.
Video tutorial
Subscription & Billing
Subscription & Billing Help
Use this guide to choose a plan, buy a subscription, upgrade, manage billing, and understand how Stripe handles secure payments for ™Cayia.
What this helps you do
This section explains how ™Cayia subscriptions work inside the app. It covers plan selection, Stripe checkout, automatic upgrades, billing management, receipts, renewal, payment methods, and what happens when premium access changes.
SoloIncome tracking, expenses, receipts, AI advisor with your own API key, and reports.
BusinessEverything in Solo plus POS, inventory, Cloud Sync, users/cashiers, and team access control.
Pro BusinessEverything in Business plus Service Tickets / Work Orders, Project Contracts, Rental Management, photo annexes, and expanded sync access.
How to buy a subscription
Open ™Cayia and go to Settings > Subscription.
Review the available plans: Solo, Business, and Pro Business.
Choose the plan that matches the way you work and the features you need.
Select the package from the subscription screen.
™Cayia sends you to a secure Stripe checkout flow.
Enter or confirm your payment details in Stripe.
After payment is completed, return to ™Cayia and allow the app to refresh your subscription status.
Confirm your plan badge and available features from Settings > Subscription.
How to upgrade a plan
If you already have an active subscription, you can upgrade directly inside ™Cayia. Common upgrades are Solo > Business or Business > Pro Business.
Go to Settings > Subscription.
Find the plan you want to move to.
Press Switch To [New Plan].
Review the confirmation message before continuing.
™Cayia processes the change through Stripe using the payment method already registered in Stripe.
When Stripe confirms the change, ™Cayia updates your plan automatically.
New permissions and features are unlocked based on the upgraded plan.
If a feature still appears locked, refresh ™Cayia or reopen the app after the upgrade completes.
1. Choose upgradePress Switch To Business or Switch To Pro Business.
2. Stripe confirmsStripe handles the secure payment change using the billing account.
3. ™Cayia unlocksPermissions and premium features update automatically after approval.
How to manage your subscription
In Settings > Subscription, use Billing Portal or Manage Subscription to open Stripe Billing Portal.
View invoices and billing history.
Download receipts for your records.
Review payment history and renewal details.
Change or update your payment method.
Update billing information.
Cancel the subscription when you no longer want renewal.
Important billing notes
™Cayia does not store your card number.
Payment processing is handled securely by Stripe.
Upgrades are designed to apply automatically after Stripe confirms the change.
Features, device limits, sync access, team access, Service Tickets / Work Orders, Project Contracts, and Rental Management depend on your active plan.
If a subscription expires, is canceled, or payment fails, some premium features may become locked or unavailable.
If billing status looks incorrect, refresh ™Cayia and check Stripe Billing Portal before creating a support request.
Business Email Packages
If your business sends heavy email reports, customer invoices, worker tickets, or tenant updates, you can add extra monthly email capacity directly from Settings > Subscription.
Tiered options: Choose between +2,000, +5,000, +10,000, or +25,000 additional emails per month.
Stripe Checkout: Add-ons are billed securely through Stripe and renew automatically alongside your plan.
Active status & cancellation: Easily view active add-ons, renewal dates, or cancel/reactivate directly in the subscription tab. When canceled, your extra email capacity remains active until the end of the paid period.
Subscription FAQ
Does ™Cayia store my card?
No. Stripe handles payment processing and card management.
Where do I see invoices?
Open Settings > Subscription > Billing Portal or Manage Subscription.
Can I upgrade inside the app?
Yes. Use Switch To [New Plan] from the subscription screen.
What happens if payment fails?
Premium features may be restricted until billing is updated and the subscription becomes active again.
Can I cancel?
Yes. Cancellation is handled through Stripe Billing Portal when available for your subscription.
BYOK AI
Connect AI with your own API key
™Cayia uses a BYOK model, which means Bring Your Own Key. You control the AI provider, usage, and cost.
What this helps you do
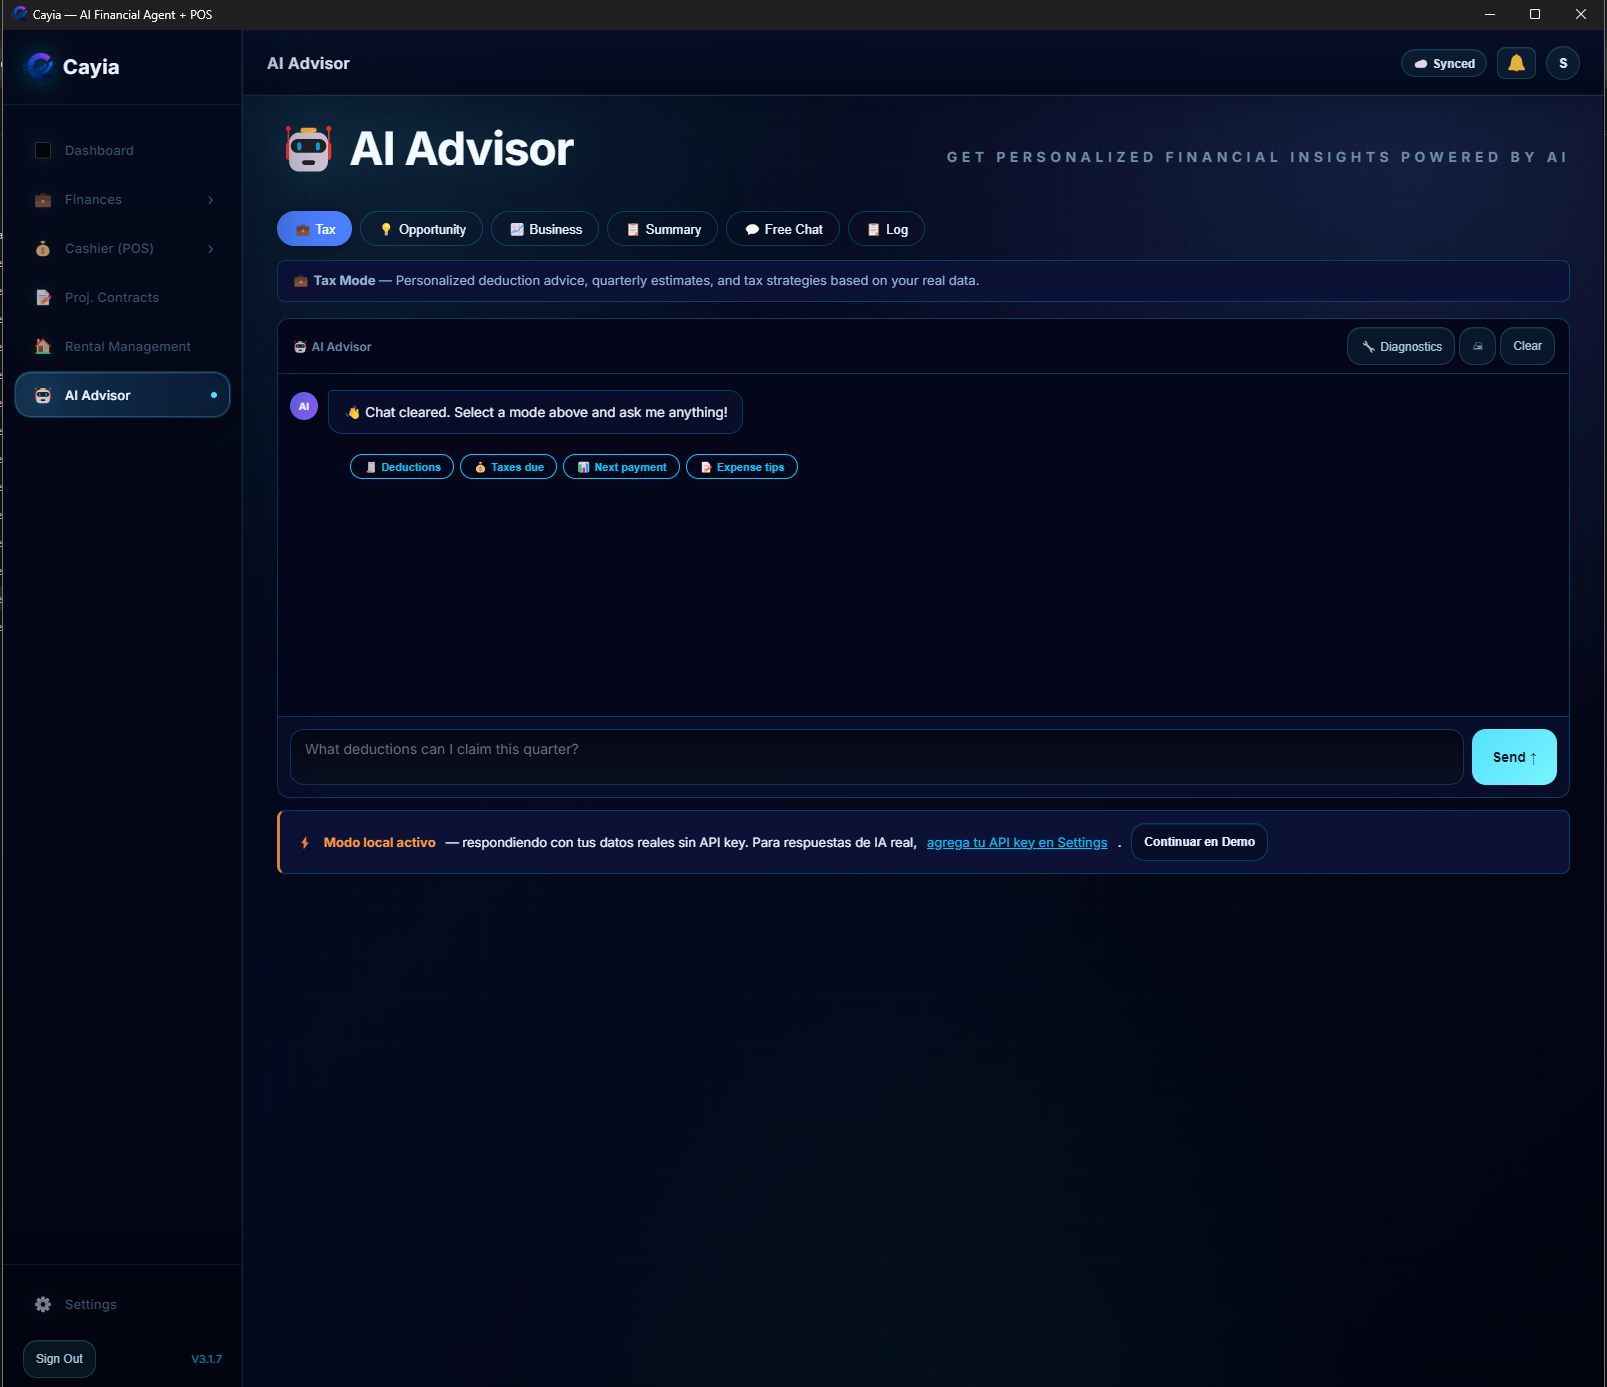
Connecting an API key unlocks advanced AI features, including financial questions, receipt analysis, summaries, inventory checks, project guidance, tenant balances, POS sales questions, cash register review, and Service Tickets questions.
™Cayia does not include an API key inside the subscription. To use advanced AI features, the user must connect their own API key from a compatible provider such as OpenAI, Gemini, Mammouth, or DeepSeek when available. This gives the user more control, privacy, and flexibility.
When to use it
Use this setup before asking AI to analyze receipts, review financial health, summarize projects, search inventory, check tenant balances, review sales, inspect tickets, or answer questions about your business data.
Steps
Create an API key with a compatible provider such as OpenAI, Gemini, or Mammouth.
Open ™Cayia and go to Settings, then AI Config.
Choose the provider you want to connect.
Paste your API key into the secure API key field.
Save the configuration and run a simple AI test question.
If the provider supports model selection, choose the model that fits your cost and quality needs.
Important tips
Never share your API key in screenshots, emails, or support messages.
Rotate the key from your provider dashboard if you believe it was exposed.
™Cayia can still be used without AI for core tracking features.
Ask specific questions for better answers, such as "What is the balance for Carlos?", "Which products are low stock?", or "What happened in cash register today?"
When supported by your provider, AI can use tools to search contracts, tenant balances, products, low stock, sales, cash register sessions, and financial summaries.
Common problems
If AI does not respond, confirm the API key is active and has billing enabled with the provider.
If a provider is not available yet, choose another compatible provider until support is added.
If AI answers the wrong area, mention the module clearly: POS, Finance, Rent Management, Project Contracts, Inventory, Service Tickets, or Cash Register.
If names or Spanish accents are not recognized, try the exact customer, tenant, project, product, or receipt number.
Practical AI examples
Finance: "How much did I spend this month?" or "What is my net income this week?"
Inventory: "Which products are low stock?" or "Do I have this product available?"
POS: "How much cash did this receipt receive?" or "What did this cashier sell today?"
Project Contracts: "Is this project profitable?" or "What materials are over budget?"
Rent Management: "What is Carlos' balance?" or "Which tenants are overdue?"
Cash Register: "Was the drawer short today?" or "Who closed the register?"
Service Tickets: "What parts did Victor use this week?" or "Which tickets are still in progress?"
Video tutorial
Video tutorial coming soon
Dashboard
Read your financial dashboard
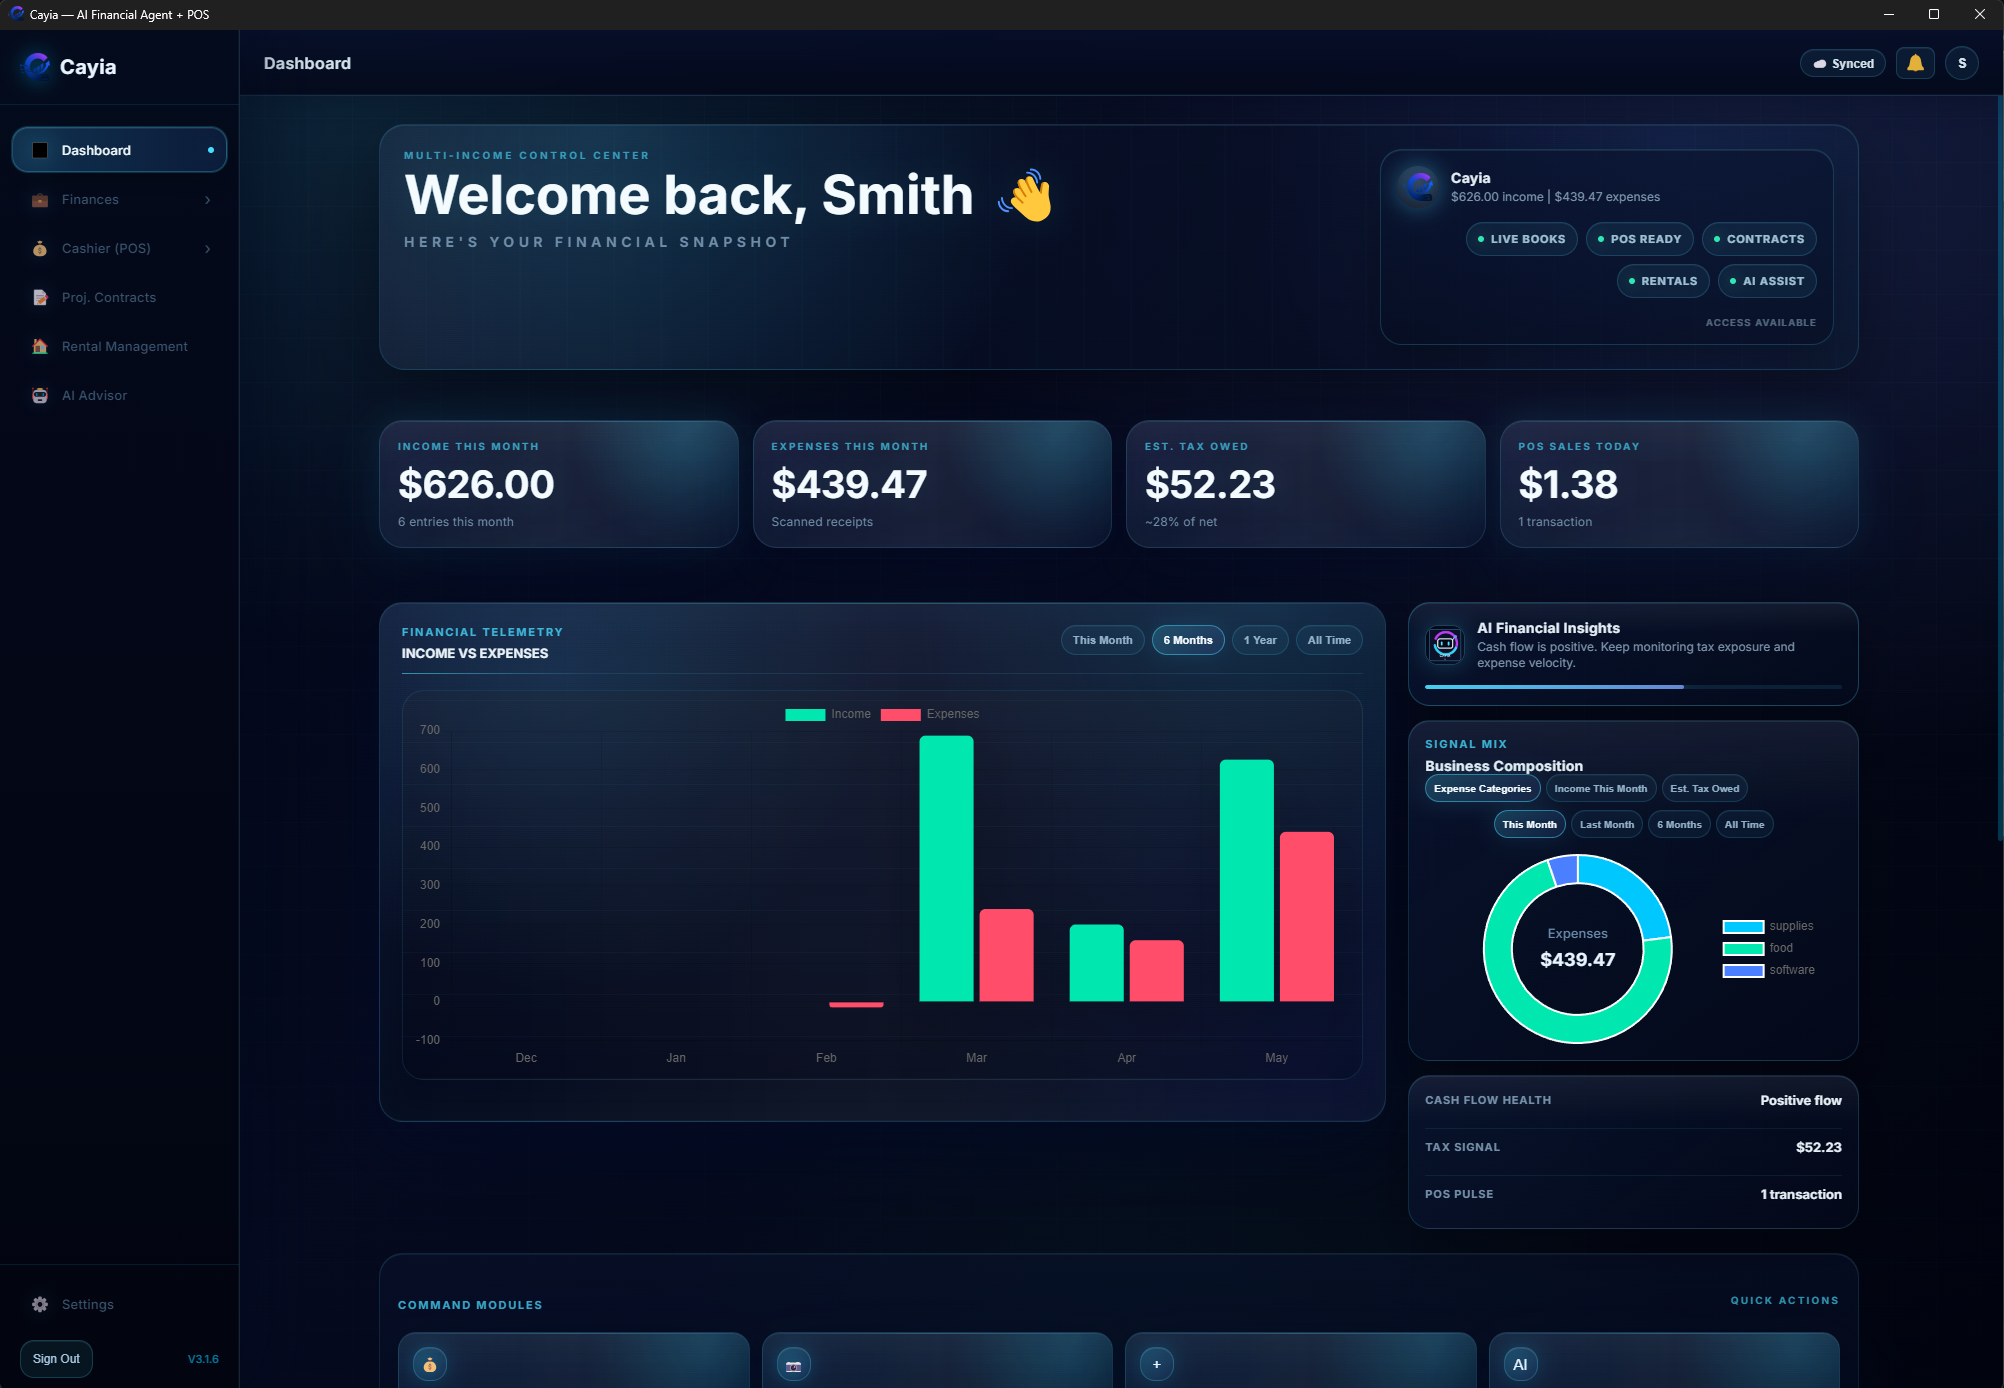
The dashboard gives you a quick financial snapshot across income, expenses, estimated tax, POS sales, and trends.
What this helps you do
Use the dashboard to understand what came in, what went out, how POS is performing, and where your money is concentrated.
When to use it
Use it at the start or end of each day, before making a purchase, after importing receipts, or before reviewing taxes.
Steps
Open Dashboard from the sidebar.
Review income, expenses, estimated tax owed, and POS sales today.
Use quick actions to create a sale, scan a receipt, log income, or ask AI.
Read charts to compare income and expenses over time.
Use category breakdowns to spot the areas consuming the most budget.
Important tips
Dashboard totals are only as accurate as the income, expense, POS, and project data entered.
Estimated tax is an operational estimate, not a replacement for tax advice.
Common problems
If a chart looks empty, add income, receipts, or sales first.
If values look old, refresh the app and confirm sync status.
Video tutorial
Video tutorial coming soon
Income
Track income
Add and organize money coming into your business or personal operation.
What this helps you do
Income tracking helps you understand revenue from side jobs, deliveries, services, projects, stores, fish markets, weekly work, monthly work, active income, passive income, and non-POS payments.
When to use it
Use it when you receive cash, digital payments, tips, project deposits, service income, or non-POS revenue.
Steps
Open the income or finances area. The Log Income screen supports English and Spanish labels.
Choose the option to log income.
Choose the platform/source, such as Uber, DoorDash, Fiverr, Store, Fish market, client work, or another income source.
Enter the date earned, amount, hours worked when relevant, and notes.
Save the entry and confirm it appears in recent transactions.
Use search or filters to find older income entries.
When deleting an income entry, review the confirmation message before approving the delete.
Important tips
Use consistent sources and categories to make reports easier to read.
Use notes to explain tips, cash payments, platform bonuses, refunds, or unusual income.
Delete only after checking the date and amount. Synced devices need the delete record so the same income does not reappear.
If you work multiple gigs, separate each platform instead of mixing everything into one general income label.
Common problems
If income does not show on the dashboard, confirm the date is inside the visible reporting period.
If the wrong language appears, use the website/app language selector and reopen the income modal.
If duplicate income appears after sync, delete the duplicate once and allow sync to finish before entering it again.
If AI or reports cannot identify a source, make the platform/source name more specific.
Video tutorial
Video tutorial coming soon
Expenses & Receipts
Record expenses, receipts & Quick Entry
Track spending, scan receipts, use Quick Entry, manage custom categories, and attach evidence.
What this helps you do
This area helps you capture business costs, log fast transactions with Quick Entry, organize spending into custom categories, correct submitted receipts, mark refunds/returns, and maintain evidence for reports and taxes.
⚡💲 Quick Entry (Entrada Rápida)
Quick Entry allows you to record transactions in seconds directly from the Finance Hub or top navigation header:
Toggle (− / +): Switch between Expense (−) and Income (+) instantly inside one simple window.
Multiplier (# Qty): Enter unit price and quantity (e.g. 5 × $12.00) to auto-calculate the transaction total.
Custom Categories (⚙): Manage your own expense and income categories with the inline manager button. Add or remove category chips on the fly.
Tax Deductible Memory: The app remembers your last Tax Deductible selection across manual entries, Quick Entry, and AI receipt reviews.
AI Camera / Attachment: Capture a receipt photo with your camera or attach files directly inside Quick Entry to run AI analysis and auto-fill details.
When to use it
Use it after buying materials, fuel, tools, supplies, meals, or whenever you need to record single or bulk expenses quickly.
Steps
Click ⚡💲 Quick Entry from the Finance Hub header or action cards.
Select − Expense or + Income.
Type the vendor/name, select or edit categories (⚙), and enter the amount or unit price × quantity.
Optionally capture a receipt photo (📷) or attach a file (📎) to run 🤖 AI analysis.
Review the date, tax-deductible toggle, and notes, then click Save Entry.
To correct a submitted receipt later, open Finances > Import Receipts, select the receipt, and save corrections.
Important tips
Always review AI-detected values before saving.
Use the refund/return checkbox when money is coming back or for store credits.
Use categories that match how you export reports later.
Edit submitted receipts instead of deleting when fixing minor details.
Common problems
If a receipt scan is wrong, retake the photo with better lighting or edit manually.
If AI does not analyze, check your API key configuration in Settings.
If a refund was detected as an expense, turn on the refund/return checkbox inside receipt edit.
Video tutorial
Video tutorial coming soon
POS / Cashier
Use the POS / Cashier
Run sales, search products, scan barcodes, charge customers, track cash received/change, and review past sales.
What this helps you do
The cashier module is for direct sales and store-style operations that need products, receipts, stock deduction, cash tracking, and sales reports.
When to use it
Use it when selling a product or service at the counter, from a device, or during mobile business activity.
Steps
Open Cashier (POS) from the sidebar.
Choose New Sale.
Search for products or scan a barcode.
Add quantities, discounts, or adjustments when needed.
Choose the payment method. For cash, enter the cash received so Cayia can calculate change.
Confirm the sale, generate the receipt, and allow Cayia to update inventory for unit or weight-based products.
Open sales reports to review previous sales.
Important tips
Keep inventory updated so POS product search is accurate.
Use user or cashier accounts when multiple people sell from the same business.
For cash sales, enter the amount received before confirming so the receipt and AI can show the correct change.
Stock is updated when a sale is saved; refresh sync if another device needs to see the latest stock.
Common problems
If POS cannot find a product, confirm the product exists and the barcode matches.
If stock looks wrong after a sale, refresh sync and review recent sales or manual stock edits.
If a cash sale shows the wrong change, review the cash received value on the sale detail or receipt.
Video tutorial
Video tutorial coming soon
POS / Cashier
Balance Cash Register & Track Tips (Cuadre de Caja)
Use Cash Register to open drawer sessions, track sales across payment methods, record tips, auto-calculate drawer balances, close shifts, and review deleted sales audit logs.
What this helps you do
Cash Register (Cuadre de Caja) gives owners and cashiers live control of the cash drawer and shift performance. It tracks opening cash, sales by payment method (cash, card, Zelle, Venmo, CashApp, etc.), tips, expected cash, counted cash, drawer deposits, and final shift differences.
💵 Tips Management (Propinas)
Report Tips: Click 💵 Report Tip in Sales Reports or tap 💵 Add Tip on the post-sale success screen (`#modal-sale-success`) to attach a tip directly to a POS sale.
Shift Auto-Calc: When the Auto checkbox (`#cr-auto-calc`) is enabled during shift closing, Cayia automatically calculates: Removed / Deposit = Counted − Left − Cash Tips (since cash tips leave the drawer separately).
Open Register Guard: Tips can only be added while a register session is open. Closing a shift freezes tips for that session to protect audit integrity.
Tips Report: Print or export the "Tips by sale" report with receipt numbers, tip methods, notes, and sale totals.
🗑 Deleted Sales Audit ("Ventas Eliminadas")
For anti-fraud protection, deleted sales use tombstone deletion (`deletedAt`, `deletedBy`) instead of hard deletion:
Owners can view the 🗑 Ventas Eliminadas report from Sales Reports, showing exact receipt numbers, items, cashier, sale amount, who deleted the sale, and timestamp.
AI Advisor can analyze deleted sales history for owner accounts to detect discrepancies.
When to use it
Use it at the start and end of shifts, when cashiers change, when closing the business day, or to audit tips and deleted transactions.
Steps
Open Cashier (POS) > Cash Register.
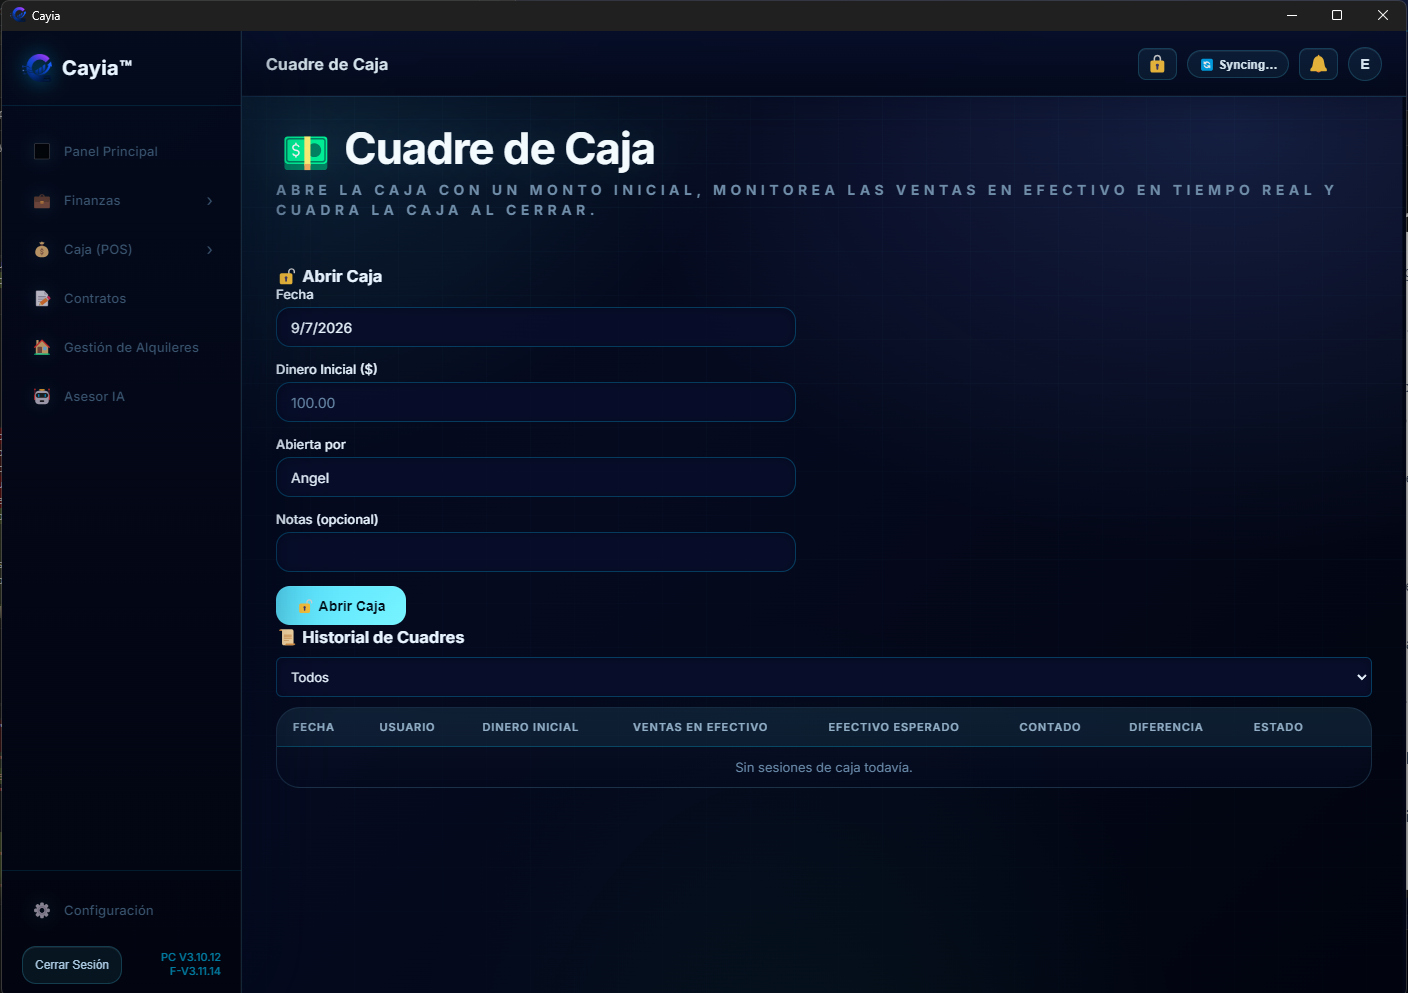
Open a session with date, opening cash, and optional notes.
Run POS sales. Sales track by payment method; cash sales add to expected cash automatically.
Report tips during the shift from Sales Reports or immediately post-sale.
At closing time, count the drawer cash, confirm auto-calculation or manual deposit amounts, and review short/over balances.
Close the shift to lock tips and print the session summary report.
Important tips
Owner controls Cash Register and Tips access via Team Access (`report-tips` permission).
Closing a register session locks tips for that shift so drawer balances stay accurate.
Deleted POS sales are logged into the owner's audit events feed.
Common problems
Cannot report tips: confirm an open Cash Register session exists and permission is enabled in Team Access.
Drawer calculation mismatch: verify whether Auto calculation is checked and whether cash tips were removed separately.
Deleted sales missing from history: use the owner-only 🗑 Ventas Eliminadas report in Sales Reports.
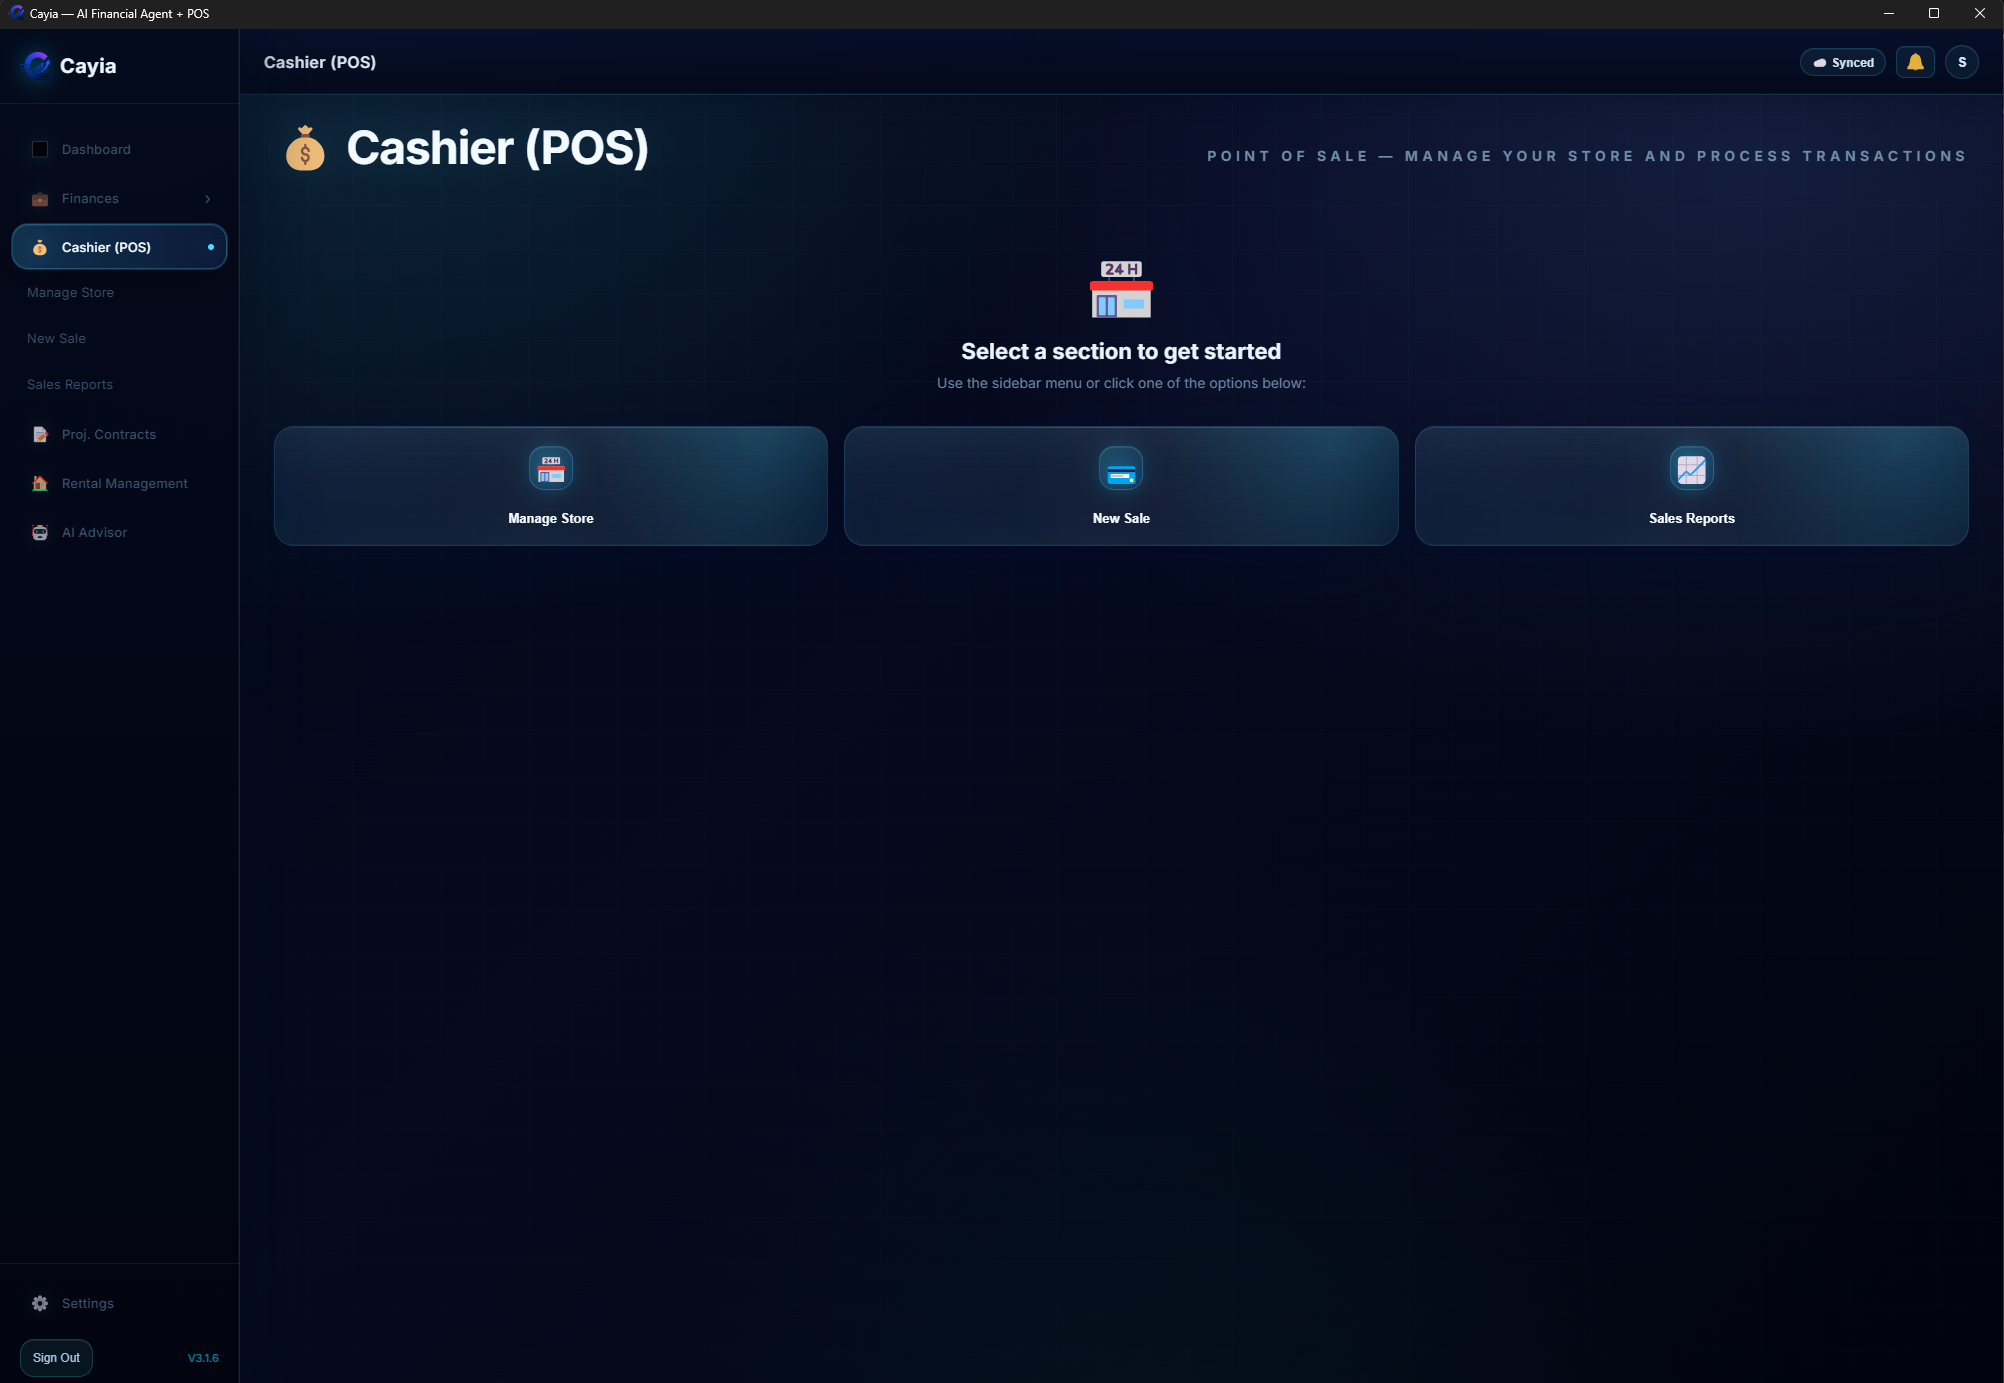
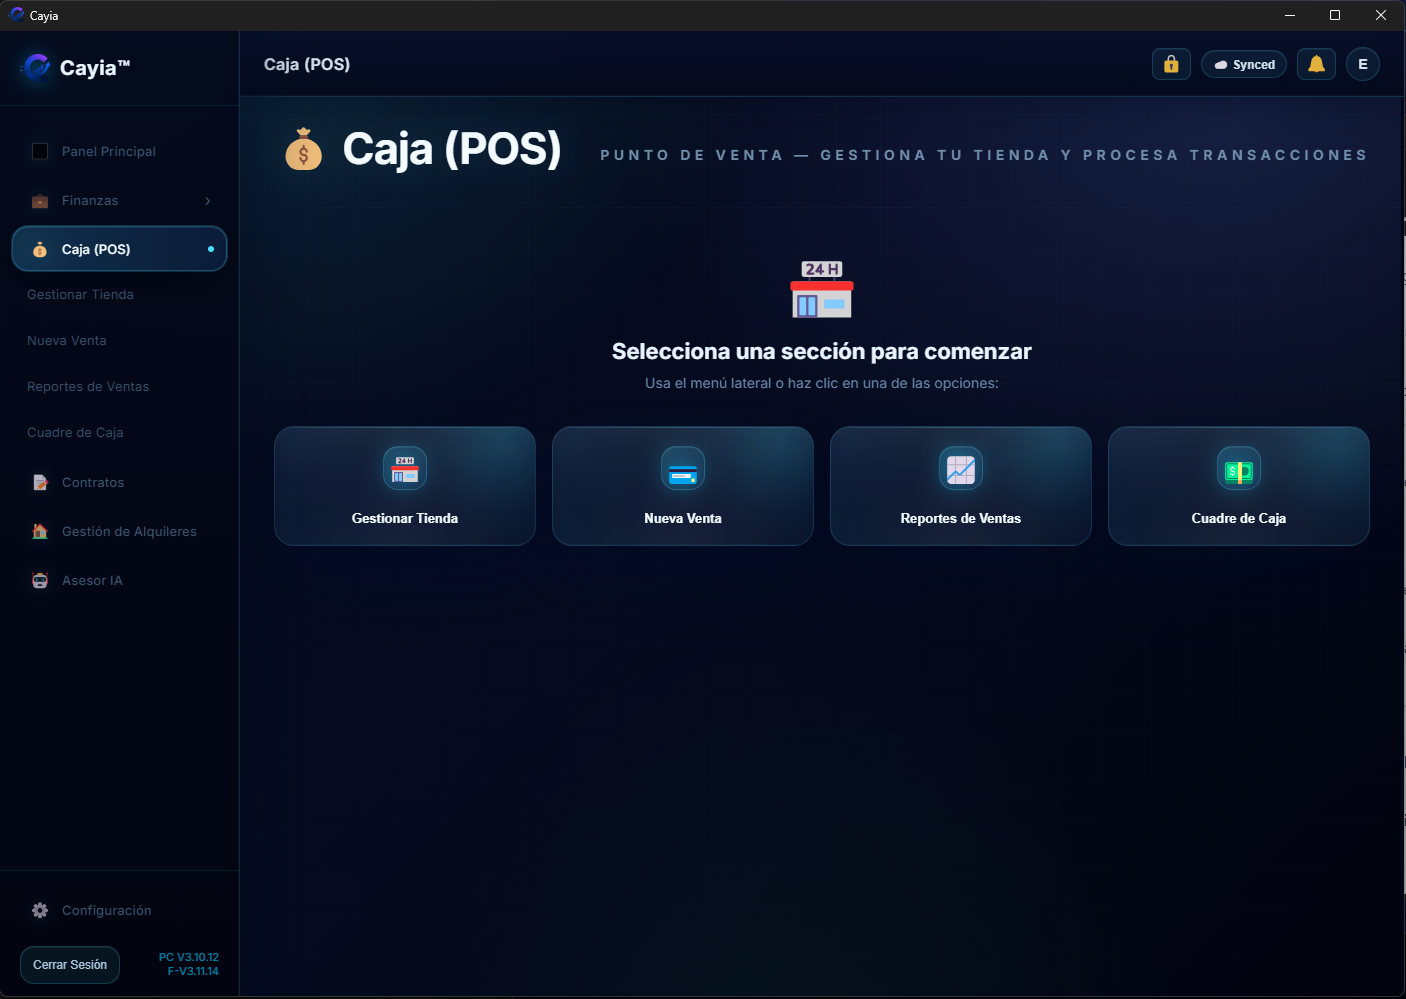
POS landing screen with Manage Store, New Sale, Sales Reports, and Cash Register access.Cash Register screen for opening the drawer, entering starting cash, and reviewing session history.
Inventory connects your products to POS sales, stock control, barcode labels, reports, and AI analysis. POS sales can deduct stock for normal unit products and weight-based products.
When to use it
Use it when adding new products, correcting product details, importing files, or preparing labels.
Steps
Open the inventory or manage store area.
Add a product with name, price, category, stock, and barcode if available.
Edit product details when price or stock changes.
Use tombstone delete when you need to remove a product while preserving sync history.
Import inventory from Excel, PDF, or AI-readable documents when supported.
Generate or print barcode labels for products that need scanning.
After POS sales, review stock levels and sync status so other devices receive the latest quantity.
Important tips
Use tombstone deletion for synced systems so old records do not reappear.
Review imported inventory before using it in live POS sales.
Check product unit type before selling weight-based items so stock deducts correctly.
Ask AI about low stock or product availability when your AI provider is connected.
If several devices sell the same inventory, sync before starting a shift and again after large sales.
Common problems
If a label does not print, confirm the printer, label size, and browser print settings.
If stock is wrong, check recent sales, imports, manual edits, and whether the sale was saved before sync.
If a weight product deducts incorrectly, review the product setup and unit/weight value used during the sale.
If a deleted product returns on another device, confirm sync completed and the delete was not done only on an offline device.
Video tutorial
Video tutorial coming soon
Pro Business
Use Service Tickets / Work Orders
Service Tickets / Work Orders is available for Pro Business accounts. Create job tickets for workers, mechanics, waiters, technicians or field teams, then review parts, labor, stages, invoices and reports from the owner workspace.
What this helps you do
Service Tickets turns Cayia into a per-worker job-ticket system. A mechanic, waiter, technician, supervisor or team member can create a ticket for each job, add customer details, describe the work, enter parts used, add labor, move the ticket through stages, and print a customer invoice when needed.
Service Tickets is a Pro Business standalone workflow. It does not automatically change POS sales, inventory, income, or Project Contracts. Use it when you want a clean work record that can be reviewed, printed, reported, or reconciled manually.
When to use it
Use tickets when a worker needs to record a job without giving them full access to finances or owner settings. Common examples include mechanic repair tickets, restaurant or waiter tickets, field service jobs, maintenance work, custom orders, supervisor notes, parts usage, labor tracking, and customer invoices.
Owner setup
Open Settings > Business.
Open the Tickets & Invoice sub-tab.
Choose the business type that best matches the workflow: Mechanic Shop, Restaurant / Waiter, or Generic.
Review the ticket fields shown for that business type, such as customer, vehicle, plate, VIN, work description, parts, labor, notes, stage, and technician.
Configure the customer invoice design with business name, phone, address, email, website, logo, title, footer and terms.
Choose which invoice fields should print, such as customer info, vehicle details, parts table, part codes, labor, technician, notes, stage and signature lines.
Use the option to hide individual prices if the customer invoice should show only the final total while the internal ticket keeps full price details.
Use Preview to review the invoice before workers start printing customer copies.
Open Settings > Sync and use the device row Tickets or Cashiers button to add a mechanic, waiter or team member with name, password and ticket access.
Open Settings > Team Access when you need to grant or edit ticket permissions such as create/view own tickets, view all members' tickets, reports, or delete tickets.
Worker workflow
The team member signs in or switches to the invited workspace account.
Open Tickets from the left sidebar.
Choose + New Ticket.
Enter the customer or job information. For mechanic mode, include vehicle details such as plate, VIN, phone or vehicle description when needed.
Select routine services or common jobs from the owner-defined checkbox list when available.
Add the work performed using clear language so the owner, customer and AI can understand the ticket later.
Add parts used with part name, code or barcode, quantity and unit price. Cayia calculates ticket totals while you work.
Add labor amount, notes, technician name or any internal detail required by the owner.
Move the ticket through stages such as Estimate, In Progress and Done.
Save the ticket and confirm it appears in the worker's ticket list.
Print the ticket or customer invoice when the job needs a paper copy.
Update the ticket if parts, labor, notes, stage or totals change before the job is finished.
Owner reports, search, filters & AI
The owner can see tickets live from every approved mechanic, waiter, technician or team member.
⭐ Set as Default Filter: Pin your favorite toolbar filters (stage, period, specific year, week range `Wk from/to`) as the per-device default view so you land on your preferred view every time you open Tickets.
Week & Year Filters: Filter parts and ticket usage by specific year and week range (e.g. Weeks 2–5 of 2025).
↩️ Deleted Tickets & Revive: Click 🗑 Eliminados to open the interactive deleted tickets modal (`#modal-tk-deleted`). Owners or authorized members can inspect deleted ticket history and click ↩️ Revive to restore the ticket (`deletedAt=null`) and automatically re-apply inventory deductions.
📧 Email Invoices & Reports: Send ticket invoices directly from the detail view with dedicated buttons: Invoice to customer (customer-facing invoice) or Full ticket to admin (internal audit ticket).
Parts Report: Review part usage by day/time, ticket number, mechanic, vehicle, quantity, unit price, and total with custom matching options.
Use AI Advisor to ask questions such as "What parts did Victor use this week?", "How much did we bill in tickets this month?", or "Which tickets are still in progress?"
Important tips
Give each worker their own login or ticket access so reports can separate work correctly.
Service Tickets / Work Orders requires a Pro Business account.
Use consistent part names and codes so the Parts Report groups similar items correctly.
Service Tickets does not deduct inventory automatically. Reconcile parts with any external inventory program manually.
Part codes and barcodes entered in tickets are used inside Cayia ticket records and reports.
Workers normally see only their own tickets unless the owner grants broader access.
Use stage changes consistently so Estimate, In Progress and Done reports stay useful.
Review invoice settings before printing customer invoices for the first time.
Tickets sync through the approved workspace and respect the same permission isolation as the rest of Cayia.
If photos or CSV export are needed for tickets, check the current version notes because those capabilities may be added later.
Common problems
The Tickets tab is missing. Ask the owner to confirm ticket access and refresh the app after permissions are saved.
A worker can only see their own tickets. This is normal unless the owner grants permission to view all members' tickets.
The owner cannot see a new ticket. Confirm both devices are synced, the worker is in the correct workspace, and the ticket was saved.
Ticket totals look wrong. Review part quantity, unit price, labor amount and whether an item was added twice.
Parts report is grouping items incorrectly. Standardize the part name/code and choose the correct matching mode: name, code or both.
The customer invoice is missing a field. Open Settings > Business > Tickets & Invoice and enable the field before printing again.
The logo does not appear on the invoice. Re-upload or resize the logo, preview the invoice and print again.
AI cannot answer about every worker. Check whether the account has permission to view all tickets and whether sync is current.
External inventory did not change. This is expected. Service Tickets does not connect to or update external inventory systems.
Ticket numbers look similar across devices. Ticket numbers are for display; the internal unique ID keeps records separate.
A worker edited the wrong stage. Open the ticket, correct the stage and review the change history if you need to see what happened.
Deleting tickets is unavailable. The owner must grant delete-ticket permission, and some businesses may restrict deletion for record safety.
Pro Business
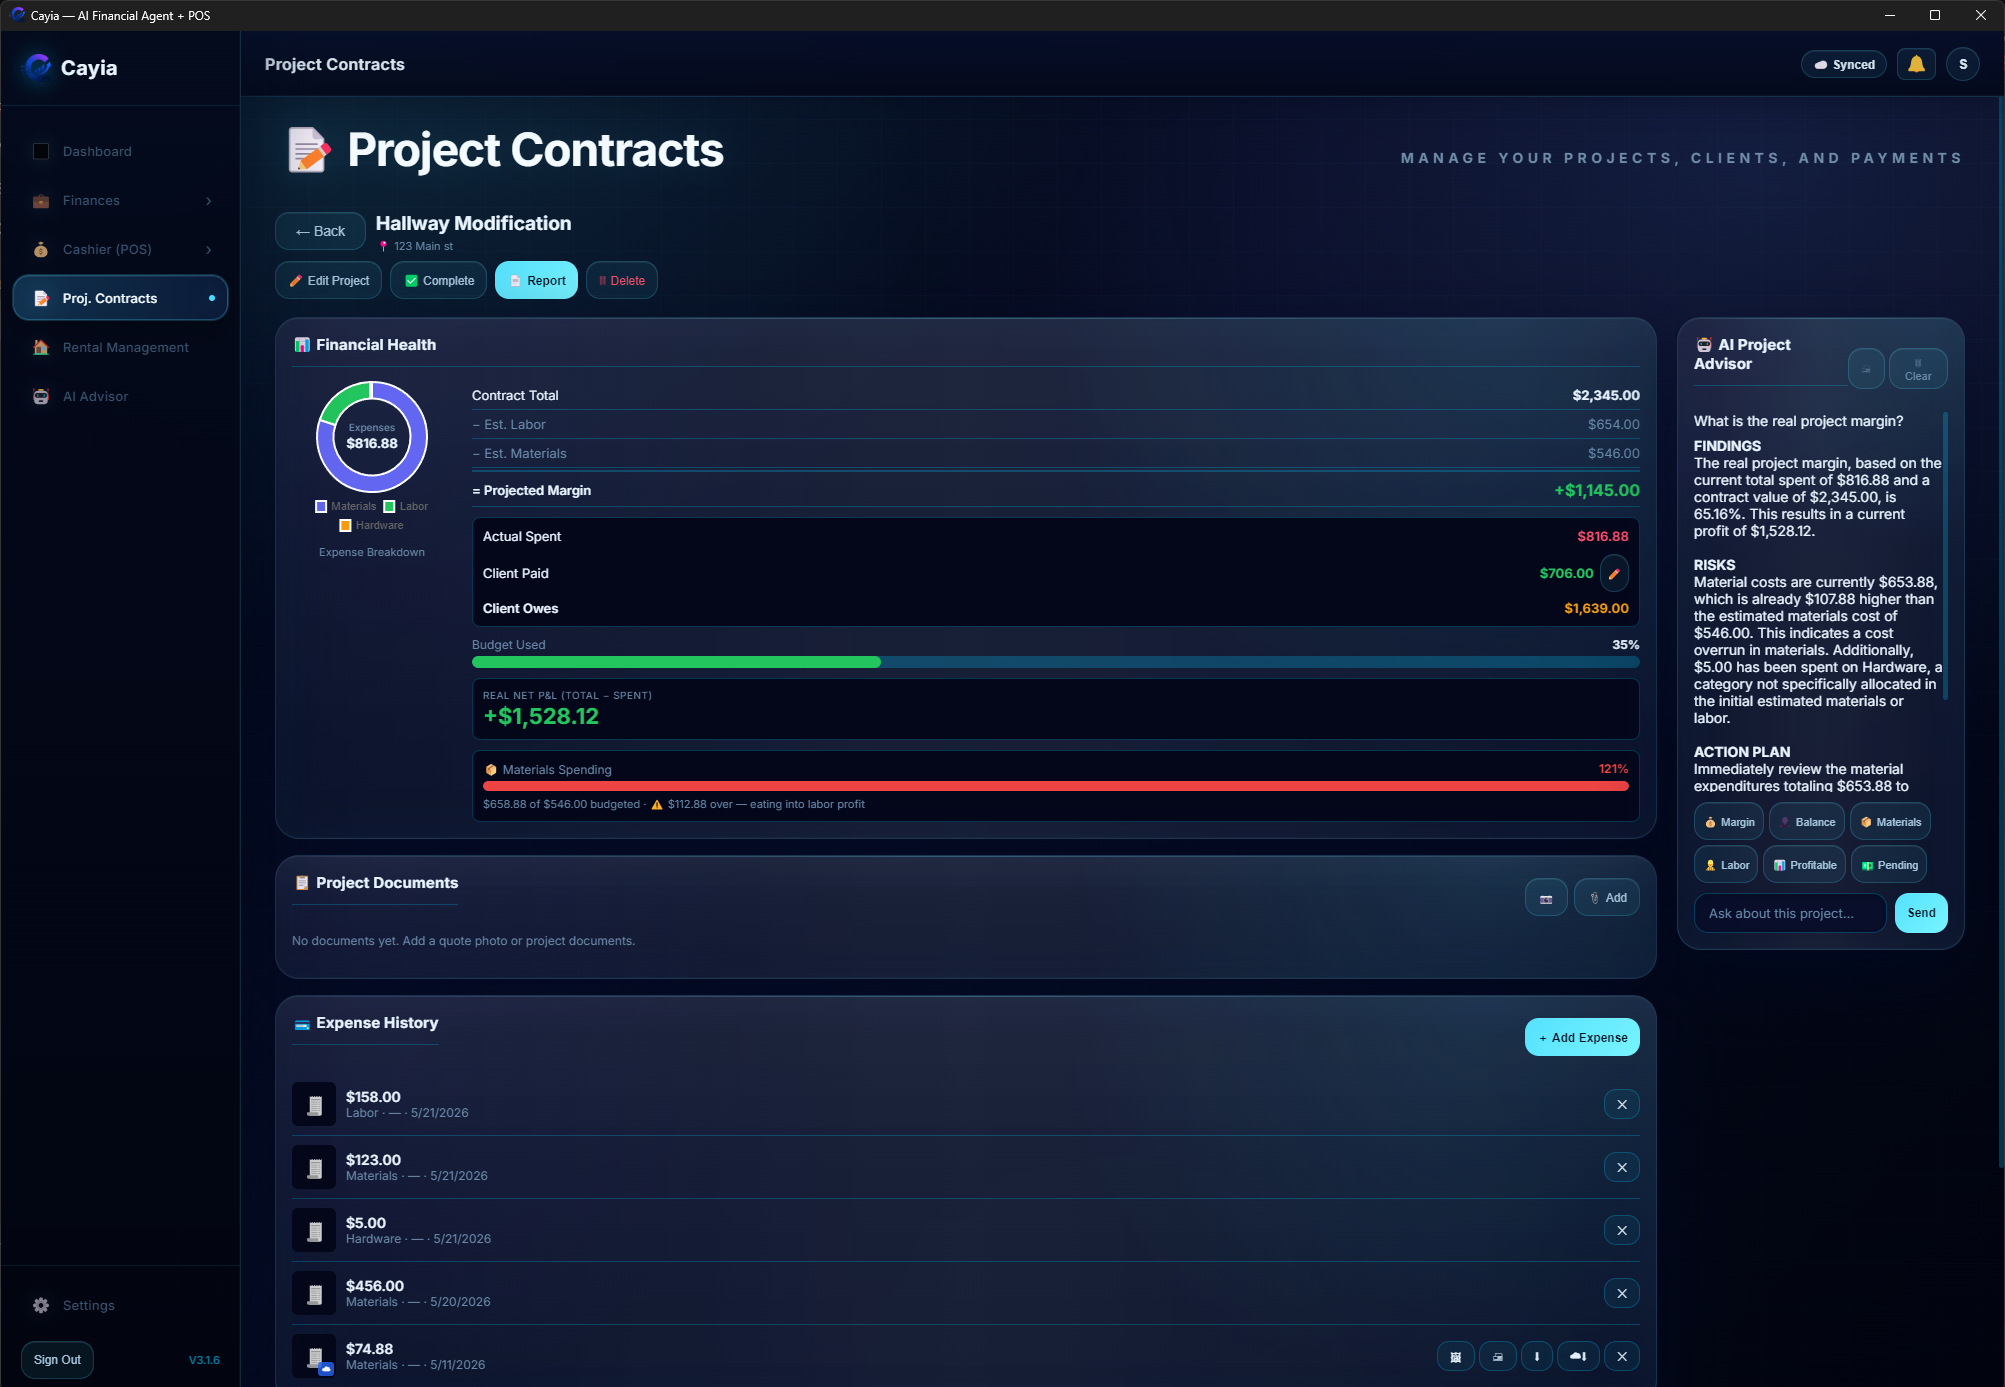
Use Project Contracts
Create project contracts, track spending, manage project documents, collect payments, and monitor net profit.
What this helps you do
Project Contracts turns each job into its own control panel with contract total, estimated costs, actual expenses, client payments, budget usage, photo proof, project documents, printable reports, and AI project questions.
📋 Project Documents Panel
Each contract includes a dedicated Project Documents panel positioned right above expense history:
Organized Grid: Displays quotes, material receipts, payment proofs, and contract PDFs in a thumbnail grid.
Interactive Actions: Per-document controls for View (🖼), Print (🖨), and Download (⬇).
File Offloading: Attachments are stored efficiently via IndexedDB and synced via FileSync to keep database sync fast.
🔒 Per-Contract Team Access
Owners can restrict team members or supervisors to specific projects (`allowedContractIds`). Non-owner members will only see and access the contracts specifically assigned to them.
When to use it
Use it for remodels, service jobs, custom work, field projects, construction, repair jobs, and any project with stages or client payments.
Steps
Open Project Contracts.
Create a new contract and add the client name and price.
Add estimated labor, materials, and expected margin.
Upload quotes or contract files directly to the 📋 Project Documents panel.
Add client payments and attach receipt photos or check images.
Review financial health, expense history, budget usage, and net P&L.
Generate a project report or email it directly from the report window.
Important tips
Project Contracts is exclusive to Master Plan / Pro Business.
Owners can limit team members to specific contract IDs in Team Access permissions.
Use AI Project Advisor to ask about profitability, balance, materials, and pending work.
Common problems
If a project margin looks wrong, review contract total, estimated costs, actual expenses, and payments.
If a supervisor cannot see a project, confirm the owner assigned that contract in Team Access settings.
If photos or documents do not render, click Download or run File Synchronization to pull cloud copies.
Video tutorial
Video tutorial coming soon
Rent Management
Rent Management
Organize properties, units, tenants, leases, rent, fees, payments, overdue balances and rental reports inside the same ™Cayia control center used for the rest of your business.
What this helps you do
Rent Management helps landlords and property managers keep rental activity connected to the bigger financial picture. Use it to track who owes rent, what has been paid, which fees were added, which accounts are overdue, how rental income affects your dashboard and reports, and how tenants connect through the Cayia Tenants portal.
When to use it
Use this module when you manage one rental property, several units, a small apartment complex, daily rentals, or rental income alongside another business. It is especially useful when more than one person helps record payments, attach proof, or review balances from synced devices.
Steps
Open Rent Management from the main navigation or from the Work area if your layout groups rental tools there.
Create a property and give it a clear name, such as the street address, building name, or rental business nickname.
Add units when the property has more than one rentable space, and label each unit consistently, such as Unit 1A, Apt 2, Studio B, or Daily Rental Room 3.
Add the tenant or renter profile with the name, contact details, move-in date, and any notes your team needs to recognize the account.
Enter lease basics, including lease start, lease end, monthly rent amount, deposit information, rent due day, and payment expectations.
Register the monthly rent charge for the correct tenant, unit, date, and billing period before recording payments.
Add extra charges or fees when needed, such as utilities, repairs, cleaning, parking, late fees, deposits, or other agreed charges.
Record full or partial payments as they arrive, including the payment date, method, amount, and any note that explains the payment.
Attach proof when available, such as a receipt image, signed note, check photo, bank confirmation, lease document, or payment screenshot.
Review the balance due after every charge or payment so you can see paid amounts, remaining balance, overdue rent, and open fees.
Apply late fees only after confirming the due date, grace period, local rules, and the tenant account. Add a note explaining why the fee was applied.
Use reminders or alerts to follow up before and after due dates, especially for accounts with partial payments or repeated overdue balances.
Check how rental income and expenses affect the dashboard, reports, and cash flow so rental activity stays aligned with the rest of your business records.
Generate or review rental reports when you need a summary for the owner, tenant, accountant, property manager, or your own records.
When the tenant portal is enabled, invite the tenant so they can review balance, payments, lease details, announcements, repairs, and chat from the separate portal.
Important tips
Use one naming pattern for all properties and units so synced teams can find the right account quickly.
Record charges before payments. This keeps balances, reports, and overdue status easier to understand later.
For partial payments, enter only the amount received and leave the remaining balance open instead of editing the original rent charge.
Attach proof to important payments and fees so there is a clear history if a tenant, partner, or accountant asks for details.
Review overdue accounts regularly and add notes after every follow-up call, message, notice, or payment promise.
Keep lease dates and due dates accurate because reminders, balances, late fees, and reports depend on those fields.
When multiple devices are synced, refresh before entering a payment and avoid two users editing the same tenant at the same time.
Use separate units for separate rentable spaces, even if they belong to the same property. This improves reporting and prevents mixed balances.
Use the Tenant Portal for renter-facing communication instead of giving tenants access to the owner app.
Open rental payments, receipts, or tenant rows to review detail before editing or deleting anything.
Common problems
The tenant balance looks too high. Review extra charges, late fees, duplicate rent entries, and partial payments before changing the balance manually.
A payment does not reduce the balance. Confirm the payment was saved to the correct tenant, property, unit, and billing period.
A late fee was applied too early. Check the rent due date, grace period, and account notes, then remove or adjust the fee if it was added by mistake.
The wrong tenant appears under a unit. Open the tenant profile and confirm the assigned property/unit before recording new rent or payments.
A property report is missing activity. Check that charges and payments were assigned to the property and not saved as general income or expenses.
Two devices show different balances. Confirm Cloud Sync is active, refresh both devices, and avoid editing the same tenant from two devices at once.
Proof attachments are missing. Check file size, connection, and whether the attachment was saved before leaving the screen.
Monthly rent is duplicated. Look for repeated rent charges for the same tenant and month, then keep the correct entry and remove or correct the duplicate.
Reminders are not appearing. Verify lease dates, rent due day, notification settings, and whether the account is marked active.
Dashboard totals do not match expectations. Review whether rental income, fees, payments, and property expenses were categorized consistently.
A tenant cannot access the portal. Confirm the tenant email, invitation status, and whether the tenant is assigned to the correct property/unit.
A rental payment was entered by mistake. Open the payment details, confirm it is the wrong record, then delete or correct it after the confirmation prompt.
Tenant Portal
Cayia Tenants Portal
Cayia Tenants is a separate renter-facing portal where tenants accept their rental connection, review their account, check payments and lease details, submit repair requests, read announcements, chat with the landlord, and manage portal preferences without entering the owner's main business app.
The portal gives renters a clear dashboard for the information they usually need most: current balance, overdue months, next payment, property details, lease dates, late fees, announcements from the landlord, repair requests, photos, and chat communication.
When to use it
Use the Tenant Portal when a renter needs to check what is owed, confirm payment history, review lease information, submit a repair request, read an announcement, or message the landlord/property manager.
Main portal areas
Home: shows current balance, overdue status, announcements, next payment, and property summary.
Lease: shows lease start, lease end, monthly rent, late fees, due dates, and related lease details.
Repairs: lets tenants submit or follow repair and maintenance requests, including photos when available.
Chat: keeps tenant communication with the landlord or property manager in one place.
Settings: helps the tenant manage account preferences and portal access.
Steps
Open the portal at https://cayia-sync-tenant.web.app/.
Sign in with the same email connected to the tenant account or invitation.
Accept the landlord/property manager invitation when it appears.
Open Home to review current balance, overdue alerts, announcements, next payment, and property details.
Use Payments to check payment history, open balances, paid amounts, late fees, and partial payments.
Use Lease to review monthly rent, due date, lease start, lease end, and important agreement details.
Use Repairs when the tenant needs to report a maintenance issue or follow up on a repair request.
Use Chat to communicate with the landlord or property manager without mixing messages with personal texting apps.
Use Settings to manage account access or preferences available to the tenant.
Review landlord announcements regularly so important notices are not missed.
Use Settings to choose available language/appearance preferences when supported by the portal version.
If something looks wrong, contact the landlord/property manager before submitting duplicate payments or repair requests.
Important tips
The Tenant Portal is separate from the owner’s main Cayia business app.
Balances and lease details depend on what the landlord or property manager has entered in Rent Management.
Overdue alerts can show past months, late fees, and remaining balances.
Tenants should check the next payment card before assuming the account is fully current.
Repair requests should include clear details and, when available, photos or proof.
Announcements are landlord messages, such as notices, reminders, policy updates, or payment-related messages.
The notification bell can show portal updates such as announcements, payment notes, or other landlord activity.
The portal can cache some lease/account details, but fresh balances require sync with the landlord workspace.
If payment information looks incorrect, verify the month, amount, partial payments, and late fees with the landlord.
Common problems
The tenant cannot sign in. Confirm the email is the same one connected to the tenant account and reset the password if needed.
The balance looks wrong. Review overdue months, late fees, partial payments, and the next payment amount before contacting the landlord.
A payment is missing. Check whether it was applied to the correct month, property, unit, and tenant account.
The lease dates look incorrect. Ask the landlord/property manager to verify lease start, lease end, and monthly rent in Rent Management.
Repair status is not updated. Send a chat message or follow up with the landlord/property manager.
Announcements are not visible. Refresh the portal and confirm the tenant is signed into the correct account.
The tenant sees the wrong property. The landlord should verify the tenant is assigned to the correct property and unit.
Chat messages are delayed. Check internet connection, refresh the portal, and verify the account is still connected.
The invitation is pending. Ask the landlord to verify the tenant email and send or approve the connection again.
Repair photos do not upload. Check connection, file size, image permissions, and try again from the device that has the photo.
Users & Team
Manage users, cashiers, and permissions
Create user access for team members and control exactly what each person can see or do.
What this helps you do
Team controls help owners separate full business access from cashier, supervisor, partner, guest, project, tenant, finance, service ticket, and cash register responsibilities.
When to use it
Use Team Access when another person needs to sell in POS, submit receipts, manage assigned projects, create service tickets, help with tenant operations, review numbers, or use a synced workspace without seeing everything.
Steps
Open Settings > Team Access.
Create or review the user/cashier profile.
Choose the role that matches the real responsibility: owner, cashier, supervisor, partner, or guest.
Enable only the modules that person should use, such as POS, Dashboard, Finances, Inventory, Project Contracts, Rent Management, Service Tickets, or Cash Register. Service Tickets requires Pro Business.
Remove access to sensitive areas when the person should not see totals, profit, finance history, or owner-only settings.
Assign specific work scope when needed, such as project work, tenant-related tasks, or operational areas.
Save the permissions and ask the user to refresh or switch to the invited workspace account.
Deactivate, remove, or kick users who no longer need access.
Important tips & Kiosk Policy
Business supports up to 3 users / cashiers; Master Plan / Pro Business supports up to 7.
🔒 Kiosk Sign-Out Policy (`S.allowGuestSignOut`): Owners can prevent cashiers or guest devices from signing out of shared store tablets. When disabled, the `#btn-logout` button is hidden on guest/cashier devices while remaining accessible to the owner account via "Owner Access".
Per-User Sign Out Permission: Owners can also toggle Sign Out access individually per user or cashier in Team Access settings.
Granular Contract Access (`allowedContractIds`): Restrict team members to specific assigned contracts while hiding unassigned business projects.
Ticket & Cash Register Permissions: Cash Register (`report-tips`), Service Tickets (`tickets-settings`, `tickets-deleted`), and report permissions are configured per cashier or team member.
For synced guests, owner-only sync tabs are hidden. Guests switch workspaces using My Connection Account.
Common problems
Sign Out button is missing: the owner has enabled the Kiosk Sign-Out Policy or disabled Sign Out for that user profile.
Cashier cannot open Cash Register: enable the Cash Register permission for that user.
Worker cannot see assigned contracts: verify `allowedContractIds` inside Team Access settings.
User sees the wrong account: open Settings > Synchronization > My Connection Account and switch to the invited workspace.
Video tutorial
Video tutorial coming soon
Synchronization
Synchronization & Cloud Sync Help
Understand how ™Cayia syncs authorized devices, team members, photos, PDFs, permissions, and temporary cloud file transfers.
What Sync is for
™Cayia uses intelligent synchronization between authorized devices and users. It is not only a backup tool. Sync helps owners share workspaces, keep teams updated, move files when needed, control permissions, sync Service Tickets, and move larger encrypted sync packages when the workspace grows.
Local firstMost business data lives on the user's device so daily work stays fast and controlled.
Temporary cloud transferCloud Sync helps move updates, photos, PDFs, attachments, and larger encrypted sync packages between approved devices.
Owner controlThe owner controls devices, team access, permissions, and original files.
Settings > Sync
Use this area when you need ™Cayia on multiple devices, when a team member needs access, when photos or PDFs must move between devices, or when you need to review sync security.
Sync Devices: review connected devices, users, plan limits, and license space.
Sync Security: review the active license, sync access, and Sync Password.
File Synchronization Photos & PDF: send photos, receipts, PDFs, and attachments between devices.
My Connection Account: switch between a personal account and an invited workspace.
Invite Team Member: invite guests, staff, or team members by email.
Ticket users: approved mechanics, waiters, technicians or team members can sync their own tickets while the owner reviews the full workspace.
Synchronization History: review when sync happened, which device was involved, and whether an error code needs support review.
Guest view: invited users with restricted access may only see My Connection Account because owner tabs are intentionally hidden.
Sync Devices
Sync Devices helps the owner understand which phones, computers, tablets, and users are connected to the workspace.
View connected devices and synchronized users.
Check device, team member, and sync connection limits for the active plan.
Remove old phones or computers that are no longer used.
Free a license slot before adding a replacement device.
Disconnect devices that should no longer receive business updates.
Sync Security
Sync Security is where the owner reviews the active license and manages the credentials used to protect synchronization access.
Important security warning
Keep the Sync Password secure. If the Sync Password is lost, recovery may require contacting ™Cayia support as a last option. Do not share it with users who should not control sync access.
Review the current Active License.
Change the Sync Password when access needs to be refreshed.
Review who should be allowed to synchronize with the workspace.
Update access after staff changes, lost devices, or role changes.
File Synchronization - Photos & PDF
File Synchronization moves photos, receipts, PDFs, and attachments between devices when needed. ™Cayia uses local file cache / device storage plus Firebase for temporary transfers, but the cloud is not the main permanent storage location for most files.
By default, original photos and PDFs live on the owner's device.
Cloud transfer is temporary and controlled, not a permanent document vault.
Other devices can download temporary copies while syncing.
The owner can upload existing photos, push images, share receipts, share PDFs, and update existing photos.
Reports may need the device to resolve images before printing or exporting, especially for contracts and rental records with photos.
Use Upload Existing Photos when older local images need to be shared with approved devices.
Use Update Existing Photos when a changed file needs to be refreshed across devices.
Use Purge Temporary Files or Clear All Cloud Temporary Files to remove temporary cloud copies when they are no longer needed.
My Connection Account
If multiple ™Cayia accounts are used on the same device, My Connection Account helps the user choose the correct workspace before syncing or entering data. This is also the main Sync area shown to many guest users.
View connected personal and invited workspace accounts.
Switch Account when moving between personal work and an owner's workspace.
Remove old accounts from the device when they are no longer needed.
If business data appears missing, confirm the user is inside the correct invited workspace.
If a guest only sees My Connection Account, that can be normal. Owner-only sync tabs are hidden from guests and cashiers.
Invite Team Member
The owner can invite team members, guests, staff, or synchronized users by email. Use the same email the teammate used to create their ™Cayia account.
The teammate creates or signs in to their own ™Cayia account using their email.
The owner opens Settings > Synchronization > Invite Team Member.
The owner enters the same email the teammate used for their ™Cayia account.
The teammate keeps ™Cayia open so the invitation can appear in their app.
The teammate accepts the invitation from their app.
The owner approves the accepted invitation.
The owner assigns permissions from the approval flow or from Settings > Team Access.
After approval, sync is active and the teammate can work inside the invited workspace according to the assigned permissions.
Synchronization History
Synchronization History helps users and owners review recent sync activity and understand whether devices are updating correctly.
See when synchronization happened.
Review which device synchronized.
Check cloud activity and sync timing.
Use the history when troubleshooting stale data or missing updates.
Clear history or remove old logs when the list is no longer useful.
Permissions and account switching
Guest users can switch between their personal account and the invited workspace from Settings > Synchronization > My Connection Account. If a teammate says they cannot see the owner's data, confirm they are inside the invited workspace account and not their personal account.
Guest access can be full access when the owner wants the teammate to help across the workspace.
Guest access can be restricted when the owner only wants the teammate to manage specific areas.
The owner can allow dashboard access or remove dashboard access.
The owner can allow finances access or remove finances access.
The owner can assign responsibilities by operational area, task, project, assigned item, or tenant-related work when configured.
A cashier can be limited to POS work, while a supervisor can be allowed to submit receipts, photos, or updates for assigned projects or tenant operations.
Device and team control
The owner controls synced devices from Settings > Synchronization > Synchronized Devices. From there, the owner can view synced devices and remove or kick a device that should no longer connect.
Team permissions are managed from Settings > Team Access. The owner can grant permissions, edit permissions, remove members, or kick members who should no longer have access.
Important tips
Business includes Cloud Sync for 3 devices.
Master Plan / Pro Business includes 15 devices via Cloud Sync.
Some plans also limit team members and sync connections, so review the plan before inviting more users.
Invite teammates using the exact email they use in ™Cayia.
Keep the Sync Password secure and update it when access should be refreshed.
Do not treat temporary cloud files as permanent backup. Keep important originals on the owner's device or exported records.
Review permissions after every role change so users do not keep old access.
When a teammate changes phones or computers, remove the old device before relying on the new one.
Do not enter the same transaction twice while waiting for sync. Refresh and confirm the active workspace first.
If sync shows a specific error code, copy the code before contacting support. It helps identify whether the issue is connection, encryption, file transfer, or permissions related.
Large sync packages may take longer. Keep the app open until the transfer finishes.
FAQ and common problems
Are my data in the cloud?
™Cayia is designed as local-first for most data. Cloud Sync helps move approved updates and temporary files between authorized devices.
What does ™Cayia keep locally?
Business records and many files are kept on the user's device. Cloud Sync is used when sharing, syncing, or transferring content to approved devices.
Are photos and PDFs stored permanently in the cloud?
No. Most photos and PDFs are not meant to live permanently in the cloud. The cloud is used for temporary transfer, and the owner can purge temporary files.
Can I use multiple accounts on one device?
Yes. Use My Connection Account to switch between a personal account and invited workspace accounts.
Invitation not received: keep the teammate's app open, confirm internet access, and send the invite again if needed.
Wrong email used: cancel or ignore the wrong invite and send a new one to the exact email used for the teammate's ™Cayia account.
Guest app was not open: ask the teammate to open ™Cayia, then resend or wait for the invitation to appear.
Owner has not approved yet: the teammate may appear pending until the owner approves and assigns permissions.
User appears but has no access: review Settings > Team Access because permissions may be too restrictive.
Guest sees personal data instead of owner workspace: switch accounts from Settings > Synchronization > My Connection Account.
Device needs to be reset: remove or kick the device from Synchronized Devices, then connect it again.
Sync appears stale: confirm Cloud Sync is active, refresh the app, and verify the user is in the correct workspace account.
Device limit reached: remove an old device to free a license slot, then add the new device again.
Photos or PDFs do not appear: run the file synchronization action again and confirm temporary files have not been purged.
Owner purged temporary files: upload or push the needed files again from the device that holds the originals.
Sync Password is lost: check secure records first. If it cannot be recovered, contact support as a last option.
Dashboard or finances are missing: the owner may have removed dashboard or finances permission for that guest.
Assigned work is missing: confirm the user is assigned to the correct project, task, item, tenant, or operational area.
Only My Connection Account is visible: the user is likely a guest/cashier. Owner-only tabs such as Sync Devices, File Sync, History, Security, and Invite Member are hidden by design.
A large sync package fails: keep the app open, check connection, copy any error code, and retry before contacting support.
Future screenshots
Sync screenshots coming soon
Video tutorial
Video tutorial coming soon
Reports
Import files, custom period filtering & export reports
Filter reports by specific month/year, export clean PDF/CSV files, or send reports by email with one click.
What this helps you do
Reports help you review performance, share information with partners or accountants, keep records, print cash register sessions, and export project, rental, or Service Tickets activity with supporting details.
📅 Custom Month/Year Date Filtering
Reports across General Finance, Receipts, Income, and Sales/Cash Register include individual month and year selectors (`month:YYYY-MM`):
Select any specific month (January – December) and any historical year present in your data.
Generate targeted monthly PDF/CSV reports without losing pre-set filters (Today, This Week, This Month, This Year, All Time).
📧 1-Click Email Reports
All printable report windows (Sales, Cash Register, General Finance, Receipts, Income, Project Contracts, Rental Reports, and Service Tickets) include a direct Enviar por email / Send by Email button alongside Print:
Send clean HTML reports straight to your inbox or client email.
Automatic image optimization ensures large attached photos or receipts send reliably without exceeding email size limits.
When to use it
Use reports at shift end, after a project stage, for tax prep, or whenever you need an official paper or email summary.
Steps
Open the report area for your target module: Finance, POS, Cash Register, Service Tickets, Project Contracts, or Rent Management.
Select the year and specific month from the period modal or dropdown.
Choose Print PDF or Export CSV.
Click Send by Email inside the report preview window to deliver a copy directly.
Important tips
Review imported PDF, CSV, or Excel data before treating it as final.
Service Tickets reports group work by worker, stage, parts, labor, and grand totals.
Project reports include financial health metrics and photo evidence.
Common problems
If an email report fails, check whether your email quota or add-on package is active in Subscription settings.
If photos are missing in a report, run File Synchronization to pull cloud copies.
Video tutorial
Video tutorial coming soon
Mobile & Desktop
Use ™Cayia on mobile, web, and Windows
Use Cayia in the browser, install it as a mobile web app, or run the Windows desktop version with update support.
What this helps you do
This guide helps you choose the right platform, install the app, use mobile shortcuts, avoid mobile layout issues, and understand desktop update alerts.
Steps
Open the web app at https://cayia-sync-app.web.app/.
On a phone, use the browser option to add the app to the home screen as a PWA when available.
On mobile, use the bottom navigation for Home, Money, Add, Work, and More.
Use or configure the mobile quick action shortcut for tasks like New Sale, Import Receipt, Log Income, Rent Management, or Add Tenant when permitted.
When typing inside forms, let the keyboard open fully before tapping the bottom navigation again.
Use the Smart Assistant toggle when the floating assistant button should be visible or hidden.
On Windows, install the desktop app if you want native windows, desktop printing behavior, and update alerts.
When an update pill, bell notification, or Help update panel appears, review the update and reopen the app if required.
Important tips
Mobile layouts are designed to avoid bottom-nav overlap, but long forms may still need scrolling before saving.
Quick actions depend on plan and permissions. A cashier may not see owner-only shortcuts.
Rental shortcuts such as Rent Management or Add Tenant appear only when the feature and permission are available.
Rotate tablets only when the layout benefits from extra width; phones usually work best in portrait mode.
If a native alert or confirmation interrupts typing, tap the input again after closing the alert.
Common problems
The bottom nav covers a button: scroll a little lower, close the keyboard, or reopen the form after the latest update.
The quick action opens the wrong place: review the selected mobile shortcut in Settings when available.
The app looks old after an update: refresh, clear browser cache, or reopen the Windows desktop app.
The keyboard stops responding after a dialog: close the dialog and tap back into the input field.
Printing does not work on Windows: check printer selection and whether the app has permission to open the print window.
Video tutorial
Video tutorial coming soon
Support Center
Support Center
Contact ™Cayia support, report problems, request account or license help, and send technical questions from one organized place.
Use the Support Center when you need help with subscriptions, billing, license recovery, Cloud Sync, account access, Sync Password recovery, device problems, API configuration, team permissions, bug reports, or feature requests.
Fast routingChoose the category first so the request is easier to review.
Clear detailsInclude account email, device name, priority and description.
Email readyYour request is prepared for support@cayia.app with the important details included.
Quick Help Categories
Pick the closest topic. ™Cayia will preselect the category in the support form and move you to the details area.
Contact Support Form
Complete the form below. When you send it, your email app will open a prepared message addressed to support@cayia.app.
Quick Support FAQ
How do I recover my license?
Use the License Recovery category and include your ™Cayia account email, license ID if available, and any Stripe billing email used for payment.
How do I reset sync password?
Choose Sync Problem or Reset Sync Password, include the owner account email, and describe whether the password is lost or needs to be changed for security.
How do I remove a device?
Go to Settings > Synchronization > Synchronized Devices. If you cannot remove it, choose Device Removal and include the device name.
Why is my sync failing?
Check the active workspace, internet connection, device limit, owner approval, and Cloud Sync status. Send a Sync Problem request if it continues.
How do I upgrade my subscription?
Open Settings > Subscription and choose Switch To [New Plan]. If the upgrade fails, choose Subscription Upgrade or Billing Problem.
How do I cancel billing?
Open Settings > Subscription and use Billing Portal or Manage Subscription. Stripe Billing Portal handles cancellation.
Why is my AI API not responding?
Check provider billing, API key permissions, selected provider, model access and internet connection. Choose API Configuration if you need help.
How do I restore my account?
Choose Account Recovery and include your ™Cayia account email, device name, and what changed before access was lost.
Prepared for future smart support
This Support Center is structured so ™Cayia can grow into a full support platform later.
Support Ticket SystemTrack support requests with case IDs and statuses.
AI Support AssistantGuide users to the right help article before sending a request.
Live ChatAdd real-time support when available.
Knowledge SearchSearch articles, FAQs, troubleshooting and plan-specific guides.
Ticket TrackingLet users review open and closed requests.
Status UpdatesShow billing, sync or app service updates.
Support HistoryKeep past conversations organized by account.
FAQ
Frequently asked questions
Quick answers to common questions about ™Cayia, AI, sync, plans, and support.
Does ™Cayia include an API key?
No. ™Cayia uses BYOK. You connect your own API key from a compatible provider.
Are my data used to train public AI models?
™Cayia is designed around user control. AI usage depends on the provider you connect, so review your provider privacy settings and terms.
Can I use ™Cayia without AI?
Yes. Core tracking, POS, inventory, reports, and project workflows can be used without advanced AI features.
Can I use ™Cayia without internet?
Some local workflows may be available depending on the app version, but Cloud Sync, sign-in, AI, and cross-device updates require internet.
Can I use ™Cayia on multiple devices?
Yes, if your plan includes Cloud Sync. Business includes 3 devices, and Master Plan / Pro Business includes 15 devices.
Can I change plans?
Yes. Open Settings > Subscription, choose the new plan, and use Switch To [New Plan]. Stripe handles the payment update securely.
What happens if my API key fails?
AI features may stop until you update the key, provider billing, model access, or configuration.
Can I cancel my subscription?
Yes. Open Settings > Subscription and use Billing Portal or Manage Subscription. Stripe Billing Portal handles cancellation and billing changes.
Where is my information stored?
™Cayia is local-first for most business data. Cloud Sync helps share approved updates and temporary files between authorized devices when sync is active.
Can cashiers use Cash Register?
Yes, if the owner enables POS and Cash Register permission for that user.
Do Service Tickets update inventory automatically?
No. Service Tickets are standalone work records. Parts entered in tickets are used for ticket totals, invoices and reports, but inventory or external systems must be reconciled separately.
Can workers see everyone else's tickets?
Only if the owner grants that permission. By default, workers usually see their own tickets while the owner can review the full workspace.
Do guests see all sync settings?
No. Guests and cashiers may only see My Connection Account because owner-only sync tabs are hidden by design.
Can tenants use the owner app?
No. Tenants should use the separate Cayia Tenants portal for balances, lease details, repairs, chat, and announcements.
Are receipt photos and PDFs permanent cloud storage?
No. ™Cayia uses temporary cloud transfer for many files. Keep important originals on the owner device or export records.
Can AI answer questions about sales, stock, tenants, projects, or tickets?
Yes, when your AI provider is connected and the data is available, AI can help search sales, low stock, contracts, tenant balances, cash register sessions, Service Tickets, parts, labor and financial summaries.
Report does not download: allow downloads and popups for ™Cayia in the browser.
Cash Register is missing: ask the owner to enable the Cash Register permission in Team Access.
Tickets is missing: confirm the owner account is Pro Business, ask the owner to enable Service Tickets permission, and verify you are inside the correct synced workspace.
A ticket does not show for the owner: verify the worker saved the ticket, both devices synced, and the worker is connected to the owner workspace.
Ticket parts did not change inventory: this is expected. Service Tickets records parts for work orders and reports, but inventory is separate.
Ticket invoice is missing fields: open Settings > Business > Tickets & Invoice and enable the fields before printing again.
Guest cannot see sync tabs: this can be normal. Guests often only see My Connection Account.
Tenant Portal invitation is pending: confirm tenant email, keep the portal/app open, and ask the owner to resend or approve the invitation.
Mobile bottom nav covers a form: close the keyboard, scroll lower, and update/reopen the app.
Keyboard stops after a confirmation dialog: close the alert and tap back into the input field.
Photos/PDFs missing on another device: run file synchronization from the device holding the original file.
Video tutorial
Video tutorial coming soon
Prepared for growth
Future help center features
This documentation page is structured so ™Cayia can grow into a complete support library.
Video tutorials embedded inside each article
Quick guides for short workflows
Mini courses for new users
Smart search inside the help center
AI help chat for support questions
Tutorials by plan: Solo, Business, and Pro Business
Open this tutorial on YouTubeYouTube blocks embedded playback from local file pages. A YouTube tab will open so you can watch it normally.Watch on YouTube